Guest viewing limit reached
  • You have reached the maximum number of guest views allowed
  • Please register below to remove this limitation
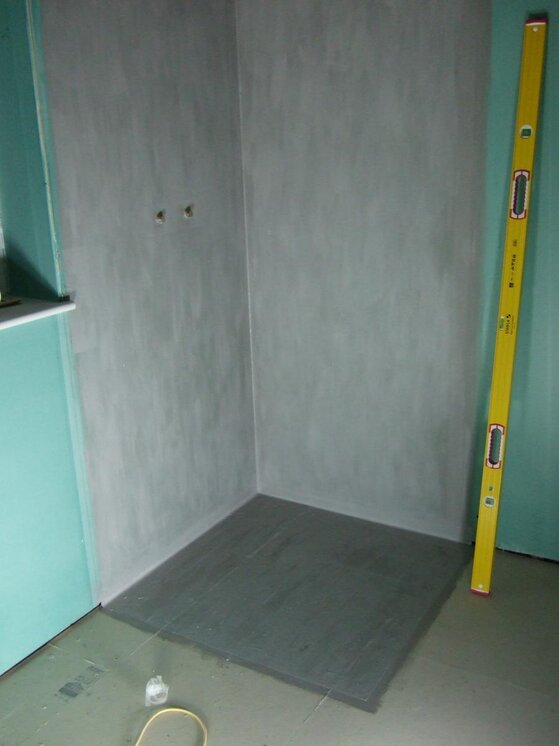
I finished the whole floor the other night.....at 01:30 in the morning. It was dark. I was tired. But I had to get it down to protect the UFH. As a result the finish is not what I was really looking for.

I bough a paddle mixer yesterday and it arrived this morning. I went for the Sparky 1360. It's a German make, so should be good. First impressions are also good. I feels well made. I wanted to go for a Refina (their warehouse is down the road at Poole) but just couldn't stretch the budget that far.
 
you need to take your time and try not to work in the dark remember you will have to look at this floor from now on patience

and as Doug says time for some pics
 
I, like most have been following this thread but its all gone quiet for a while. Guessing PJ has been busy busy
 
What do you do for a living PJ?
Just interested...
I am a senior engineering manager for an aerospace company. I have a background in software.

I went back into education at around 27 after doing a number of jobs; metal worker, van driver, motorcycle courier, order picker, skilled labourer, etc. I took a National Diploma, a degree (BSc Hons) and a second degree (MSc). During my education, I worked for nature conversancy groups as an estate worker and for a county council.

After completing my education, I worked for the government as an ecologist / modeller / software programmer before joining the aerospace company for whom I currently work.

Despite my academic background, I've always been good with my hands. I tend to be able to do lots of things well but rarely excel at anything.
 
Last edited by a moderator:
The work is progressing well, if slowly. I'm taking my time on the walls. I do have lots of pictures (of the entire job) but haven't had any time to post them. I will try and do something this weekend.
 
Wow Aerospace?

My freinds son does a similar thing but he had to sign the official secrets act I think.

I'm glad the jobs going well.
 
Last edited:
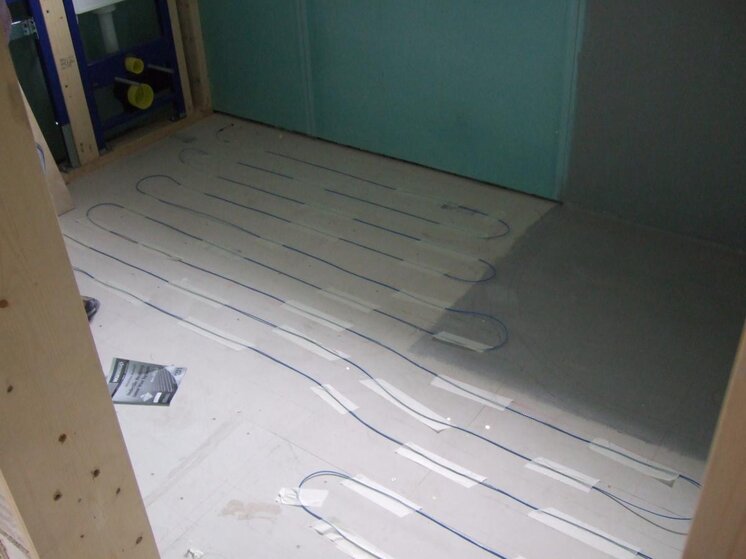
When I installed the UFH, I followed the instructions on the pack. Once I had taped down the loose wires, I tiled straight over the top. However, I've seen a few posts which refer to SLC with regard to UFH. What is SLC and should I have used it? What's the impact of not using it?
 
slc is self levelling compound

it will encapsulate the ufh and protect it,say you needed to change a tile a year down the line due to a breakage then it will be easier to remove it

also going over the wires with adhesive can leave hot spots...areas uncovered
 
When I installed the UFH, I followed the instructions on the pack. Once I had taped down the loose wires, I tiled straight over the top. However, I've seen a few posts which refer to SLC with regard to UFH. What is SLC and should I have used it? What's the impact of not using it?

Nothing as long as you fully enbed the wires into adhesive,,
 
OK. I've got the night off so time to post some pictures (in between ordering doors, lights, etc).

DSCF7602.jpg
Tanking the shower area in the dark.

DSCF7610.jpg
The completed job.

DSCF7628.jpg
My re-installation of the wet wall

DSCF7667.jpg
The loose wire UFH goes down.

DSCF7654.jpg
D'ya remember that night out...


DSCF7675.jpg
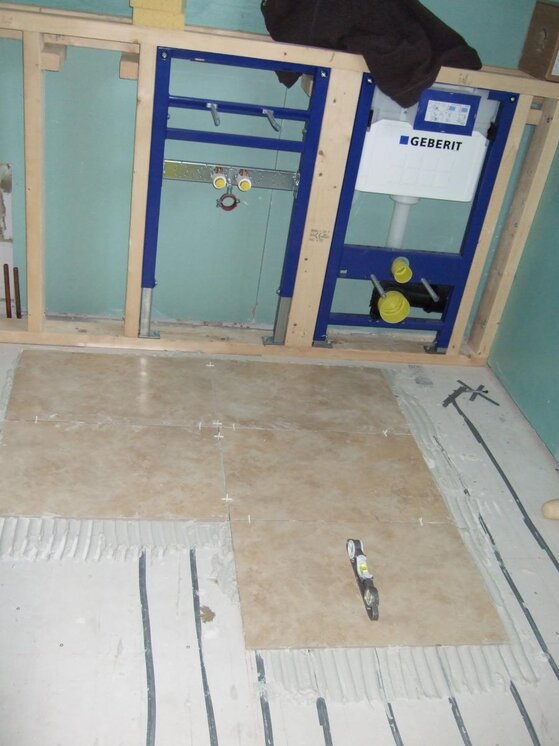
The floor tiles being laid

DSCF7685.jpg
Floor tiles almost done...

DSCF7687.jpg
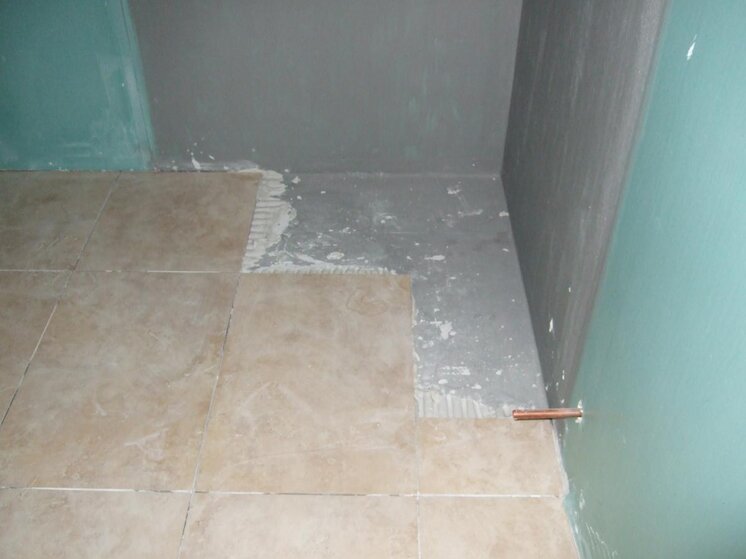
But not under the shower......

DSCF7686.jpg
.......or the bath.

DSCF7711.jpg
Starting on the wall tiles

DSCF7712.jpg
and getting addy all over the new shower tray

DSCF7710.jpg
A bit more progress


DSCF7703.jpg

With all this downstairs to do.

I've actually made a little more progress than the pictures suggest. One wall is now completely tiles and doesn't look too bad. Had a few problems yesterday with the addy being too wet. We seem to be getting a fair few lumps as well despite a real thorough mixing with the paddle mixer.
 
I do have a problem looming. Despite the time I spent thinking about the setting out, I neglected to consider the tiles above the wet wall and the thickness of the window cill which sits on top of it.

If I tile down to the cill, I'm going to have the problem of a tile which is too thin. Tiling behind the cill doesn't seem right somehow. I'd have to increase the height of the wet wall considerably if I want to avoid taking slithers off a large tile to make it fit and lowering the height of the wet wall is impossible.

I do have some "detail" travertine mosaic tiles which I wanted to fit as a course right round the wall but just couldn't get the setting out right if I used them. Maybe I can use them to get myself out of a bind somehow? I need to give this more thought.
 
Doing yourself proud there PJ...well done. Sounds like the mosaic could be a good idea, but your right to give it more thought.

And yep, I do remember nights out like that in pic5! lol
 
Work progressing very slowly at the moment. Was ill for a couple of days, so no proess at all on those days. I am currently working around the window. Got a couple of slithers to deal with (the cill is the same height as the wet wall) and have been agonising over the fitting of the trim around the window.

I tilied the reveals first and then planned to tile the wall and fit the trim then. It's not really working out. Don't get me wrong.....it's not bad just not perfect. If I were to do it again, I'd tile the walls first and fit the trim and then tile the reveals to suit. Still, I can use that lesson learnt when I tile the downstairs cloak.

Oh, and the spark was round today and we have lights! My wife isn't keen on the downlighters we've gone for. They're OK in the bathroom but not so good in the hall. They don;t light the whole room somehow and can be a bit blinding. I'm hoping things will improve when the walls are painted white.

Oh and the downstairs has been screeded. They used a retardant so it's taking a while to go off. And they added some fibrous stuff yo help it bond together. They've made a pretty good job of it and it nicely covers the wet UFH.

The PM is keen that we buy the doors so they can get on with the second fix chippy work but I'm delaying as I need to buy quite a few and want to avoid storing them any longer than I have to....especially when the wet trades have just finished.

When I get time, I'll post some more pictures. Hopefully, you'll be impressed!
 
Actually, I have a question. The foreman/plumber have suggested I tile to the bath rather than behind it. Is this the best way to do it?
 
Yep, me too.. tile to the bath.. The bath will have a chamfered edge and tiling the wall first will mean when the bath is put into place you will have a rather large Silicon joint from bath edge to wall, if you get my drift..
 
Hi PJ,
Check the walls for squareness when you fit the bath. It is sometimes needed to inset the bath into the wall (slightly) to overcome wide joints (either in the corner or at the bath extremities), or if the roll on the bath is a little excessive. One thing to watch out for though, if you need to inset the bath, make sure that you will have full access to the taps as sometimes the taps can get too close to the tiling surface.


Now then stranger..🙂
 

Advertisement

Thread Information

Title
DIY Tiler - 90 sq m of large format porcelaine tiling making me nervous!
Prefix
N/A
Forum
DIY Tiling Forum
Start date
Last reply date
Replies
232

Advertisement

Tilers Forums Official Sponsors

UK Tiling Forum; UK

Thread statistics

Created
PJPro,
Last reply from
Dan,
Replies
232
Views
57,037

Thread statistics

Created
PJPro,
Last reply from
Dan,
Replies
232
Views
57,037
Back