Guest viewing is limited

tricky tiles onto former and wetroom floor...

Tilers Forums Official Sponsors

Hi All,
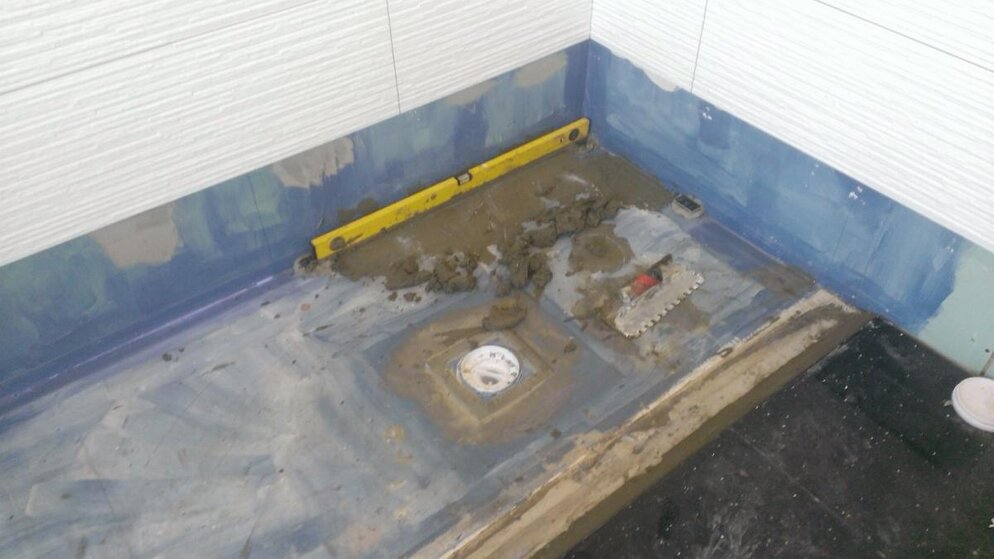
I was asked to fit these tiles onto the former and floor of this wetroom, being new to tiling formers I tried to work it out but always ended up with very small corners cut off...I think it would have been a knightmare, would anyone have attempted this one?


20131212_141645 (1).jpgfloor.jpgformer.jpgtiling.jpg

Customer is now going to buy mosaics! so hopefully they will be somewhat easier to lay...probably a stupid question but when using mosaics if they are the bigger ones would they need to by cut to lay on the former..I have read that the smaller ones do not as they 'mould' into the contours..Hope this is right, again any help very much appreciated..this room was fun to tile...not:lol:
 
Can be done. Move your watste cut out into the centre of one of the boards, this wil give a decent cut to the side of the tray.Not the easiest tile to use, but cut correctly will look very good.
If they are going to change to mosaics the size will depend on the type of tray.
If its a expanded foam type with cement on, the minimum size is 50mm.
Or if its solid ( impey for example) you can pretty much use what you like.
 
Hi
Thanks for the reply, The waste is offset within the topp dec former so could I could not get it to match both sides, ended up with brain ache:smilewinkgrin: would that make a difference at all?
 
I assume the rest of the floor around the tray is laid half bond? If you laid the tiles random bond you could adjust the rows to suit, which would eliminate any small triangles. Probably a bit late in the day for this suggestion though :lol:
 
Mosaics do dot need to be enveloped if that's what you mean, they will mould to the fall as they are all broken and can move independently. However, you will need to use a much thinner bed of adhesive with mosaics or it could end up very messy, so you will need to screed the fall properly before you tile, I will try to attach some pics...
 
First, I set my height around the drain
image.jpg
Next, set my height around perimeter (dots)
image.jpg
Next, connect the dots
then screed between the levels to create the fall, then tile

image.jpg
image.jpg
image.jpg
 

Attachments

  • image.jpg
    image.jpg
    76.2 KB · Views: 280
Yes. I used webber thick bed. It can be very sticky though so you will find you need to do in two stages to get a nice smooth finish.
 
Thanks Bri, did not think of that, pity..mosaics it is...the floor is quite uneven ( I didn't lay it!) So screed first might be good opportunity to smooth it all out ;-)
 
Thanks mr t


Ok, to create a screed you need two things... Screed runners to form your screed.


to make a screed runner you need another two things, ... Dots


dots can be set using a laser, then rapid set between the dots and you have a screed runner, rapid set or sand cement or slc between the runners and you have a screed. What is a good screed... One big flat 'plane' to tile on


You you can make anything using this technique.


You you need to think of tiles not as tiles but large sections of tiles locked in to 'planes' , eg place a 2m straight edge on a tiles surface and all the way along the tiles will be in contact with the tile face.... Then these tiles are all on the same 'plane'. When you create a plane for let's say a floor you can break the plane of the tiles to do what you want, maybe loose height to get under a door for example or gain height to come level with another surface, all this is done by breaking the plane of the tiles, that's what your doing creating a fall in a wet room.


I don't expect you to grasp what I'm describing mr t but at least you are inquisitive enough to ask. I'm not on here all that often but I see more people giving you more credit for your enthusiasm, keep asking questions and listen to the right ones and I bet you will be doing work beyond your expectations. There are plenty of tutorials on youtube showing you the basics of screeding, once you practice and master it then the tiling world will be your oyster. Just remember "plane"
 
You you need to think of tiles not as tiles but large sections of tiles locked in to 'planes' , eg place a 2m straight edge on a tiles surface and all the way along the tiles will be in contact with the tile face.... Then these tiles are all on the same 'plane'. When you create a plane for let's say a floor you can break the plane of the tiles to do what you want, maybe loose height to get under a door for example or gain height to come level with another surface, all this is done by breaking the plane of the tiles, that's what your doing creating a fall in a wet room.
ive had to read this part 3 times and still havnt grasped it fully lol i do have a couple more questions before i sleep on it and thanks in advance mate very insightful...

1) firstly in you demo pics once you have screeded onto the former, is that a level surface or have you 'broken the plane' as you say?

2) and when you say breaking the plane im assuming you mean slowly sloping down from the original floor height as that is how it is in my head or do you mean level then drop level then drop like very long but small dropping steps (if that makes any sense what so ever lol) mind you i suppose that wouldnt work as it would create lippage.

thank you for taking the time bud :smilewinkgrin:
 
ive had to read this part 3 times and still havnt grasped it fully lol i do have a couple more questions before i sleep on it and thanks in advance mate very insightful...

1) firstly in you demo pics once you have screeded onto the former, is that a level surface or have you 'broken the plane' as you say?

Yes ive broken the plane. Field tiles are level then mosaics are sloping towards drain.

2) and when you say breaking the plane im assuming you mean slowly sloping down from the original floor height as that is how it is in my head or do you mean level then drop level then drop like very long but small dropping steps (if that makes any sense what so ever lol) mind you i suppose that wouldnt work as it would create lippage.

correct!

thank you for taking the time bud :smilewinkgrin:

no problem mate
 
Charlie, many thanks, your advice invaluable:smilewinkgrin: I get the planes thing..dont have a lasr yet but guess a level will b ok...any tips on setting the drain level..what would u allow for adhesive. ..? 2/3mm? And 3mm notched trowel? And use float to press in...sorry so many questions just want to get it right..thankyou for your time..Lee
 
looks in the pics like a very skilled job just to keep it mess free never mind actually creating the fall thanks again mate
 
ohhhhhhh i get it just been looking tray formers up.... they already gave the angle and the 4 lines... its just a case of building the 'plane' up antil you reach your desired height? i think lol
 
hi Charlie,
thanks for the advice... I will lay thin bed of screed to the former to create the 'plane' ..just a quick question..The whole floor will be mosaiced (white travantine) so do I follow the same process as for the former for the remainder of the floor just with less of a gradient? :smilewinkgrin:
 

Advertisement

Thread Information

Title
tricky tiles onto former and wetroom floor...
Prefix
N/A
Forum
Canada Tile Advice
Start date
Last reply date
Replies
21

Advertisement

UK Tiling Forum

Thread statistics

Created
leezo,
Last reply from
leezo,
Replies
21
Views
10,817

Thread statistics

Created
leezo,
Last reply from
leezo,
Replies
21
Views
10,817
Back