Currently reading:
outside corner in rectangle bathroom

Discuss outside corner in rectangle bathroom in the DIY Tiling Forum area at TilersForums.com.

M

mr angry

hi guys,

please excuse my terminology if i dont describe my current diy job. i have just ordered tools from amazon... cube laser, trowel, float, grout etc... i have not ordered the leveling tile kit yet as there are so many to choose from so hopefully someone can recommend a cheap good kit.

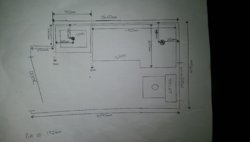
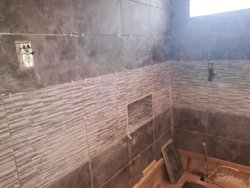
anyways, i am about to start tiling my bathroom but im not sure how to tackle the outside corner inside the bathroom. my choice is the offset method rather than the stacking one. maybe you can convince me otherwise :/

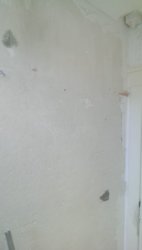
i would also add that i cannot get the rest of the pant off the wall as its stuck pretty good. ive read on google that all paint should be removed or by doing heavy scores in the plaster to make the adhesive bond. what do you recommend for heavy scoring the walls as i feel using a razor blade is not suffice.

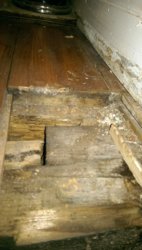
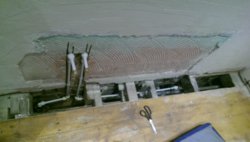
i also have to tile the floor and upon checking this it looks like a 9m ply was used for the tiles already laid. should i use the same thickness of ply when i do the floor? if so, then i will be left with a step up into bathroom like before (not a big problem) around an inch height. i need to rip it all up anyways due to radiator pipe work and water inlet for toilet being offset.

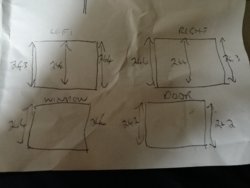
the measurements for wall width 22cm for left width and 45cm for the right width. the tiles for the wall are 298mm x 498mm bought from b&q. if you need any more info please tell me.

should i start tiling the walls first or the floor?
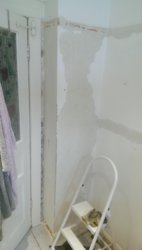

IMAG0015.jpg
thanks

cameron
 
Last edited by a moderator:
O

Old Mod

If you want an off set look, find centre of both walls and draw a plum line top to bottom on each.
Whether you choose to start full piece or cut piece on the first row is entirely your choice.
For us we would see how that relates to the whole room rather than focusing on that one small area.
So follow the bond around the room see if it presents complications elsewhere.
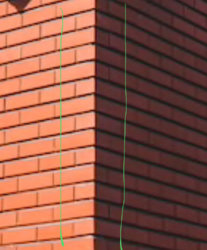
This is the look you will try to achieve.
Every other course will look like one tile wraps around the corner.

9F63AA8D-5322-429C-B114-85EAAC0C93E4.jpeg
 
M

mr angry

after much consideration i will stack the tiles, not my preferred choice but should alleviate much headache. it will look nice but not as nice as i can visualise :(

as for my outside corner (left & right)im assuming that i will just use cuts to stack/lay up the wall and then work from the middle main wall in the photo.

also, when i attempt the floor is it ok or pleasant to the eye to have the offset look against a stacked wall tile?

just need to get a baton and plywood from b&q :) and its hammer time :)

cheers
 
Last edited by a moderator:
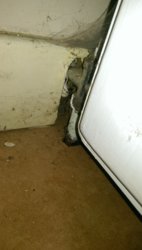
M

mr angry

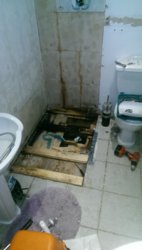
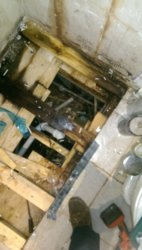
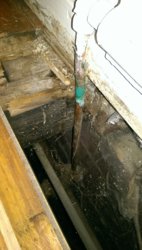
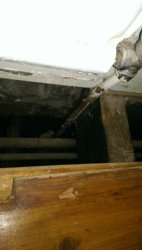
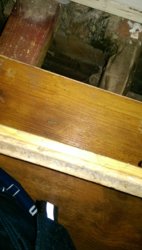
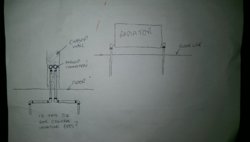
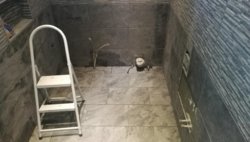
here are some photos of floor and piping for radiator. how far down should i cut the pipe in order to put a bend on it? is my diagram ok for what i plan to do? my terminology is crap so please tell me exactly what parts i need. you will see from photo diagram of how my radiator is and the other diagram of my proposed look when ive sorted the pipework.

can i use plastic pipe on copper or just copper? is there a preference. i realise this is a tiling forum so im assuming some you you professionals tackle this type of thing everyday....maybe im wrong :/

should i replace the floorboards with a thicker plywood? my intentions were to keep the floorboard as it is 22mm thick and seems in a reasonable condition. my issue is what thickness should i replace the floor with and how thick a backer board should i use on top? is this the recommended way forward? can i use a thicker than 22mm plywood??

thanks in advance

cammy

IMAG0020.jpg IMAG0021.jpg IMAG0063.jpg IMAG0064.jpg IMAG0065.jpg IMAG0066.jpg IMAG0067.jpg IMAG0068.jpg
 
Last edited by a moderator:
M

mr angry

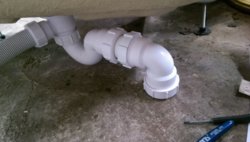
here is where my drain valve is in my dinning room :(

also, since i cant join the plumbers forum just now can someone advise on the best way forward for the u bend from bath? can i have the wast from bath go straight down and underneath floor boards with the u bend going straight into the pipe? or do i need to have the ubend above the floor line meaning i have a s shape trap as shown in photo with the waste going straight down adding into the pipework below floorboards. is there any pros/cons of having it above or below?

cheers

IMAG0073.jpg IMG-20180710-WA0006.jpeg
 
W

WetSaw

here is where my drain valve is in my dinning room :(

also, since i cant join the plumbers forum just now can someone advise on the best way forward for the u bend from bath? can i have the wast from bath go straight down and underneath floor boards with the u bend going straight into the pipe? or do i need to have the ubend above the floor line meaning i have a s shape trap as shown in photo with the waste going straight down adding into the pipework below floorboards. is there any pros/cons of having it above or below?

cheers

View attachment 99538 View attachment 99539

If there's too much fall before the trap it can end up being syphoned out , also it's obviously better if you have access to the trap for cleaning.
 
M

mr angry

If there's too much fall before the trap it can end up being syphoned out , also it's obviously better if you have access to the trap for cleaning.

please define how much the fall is? what is the tolerance before a syphoning effect happens? i reckon the distance from the bath to the connecting pipes below floorboards would be about 1 to 1 half ft max.

cheers
 
M

mr angry

hi guys,

what type of screws do i need for overboarding? i have a 22mm thick floorboard and 18mm wbp plywood going on top. the room is about 9ft x 5ft does anyone have a rough guess how many screws i need?

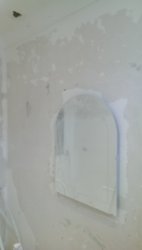
the walls are stripped back to plaster, do i need to prep the walls, floorboards or the ply before i start screwing it down?

to get the paint off the walls i just used an electric planer and it came off in seconds....very dusty though lol

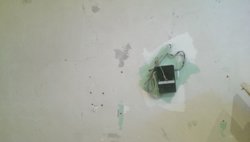
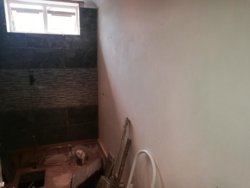
here is an update on walls and pipework so far...


cheers

IMG-20180722-WA0001.jpeg IMG-20180722-WA0003.jpeg IMG-20180722-WA0005.jpeg IMG-20180725-WA0002.jpeg IMG-20180725-WA0004.jpeg

IMAG0125.jpg IMAG0126.jpg
 
On masonry walls I use a welders chipping tool,it looks like a small pick axe and makes short work of chopping into walls to create a mechanical fixing for tiles.Holes are space at about 50mm apart.First tile walls but leave out bottom cuts as you will tile the floor next and then bottom wall cuts last.
In my area I offer diyers an hour of tuition for £25 maybe there is a tiler here who can get you started.
 
M

mr angry

hi guys,

my reactangular bathroom is not equal at the short sides ie window side and opposite door side. it is about 2-3cm out at the window side compared to the door side. i suppose what im trying to say is that it tapers outwards towards the window side if that makes sense. how do i tackle this before i start tiling?

if i leave it as i will know doubt have issues with squaring this off when i do the floor. any ideas on how to remedy this situation is most helpful :)

cheers
 
S

Spare Tool

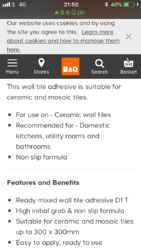
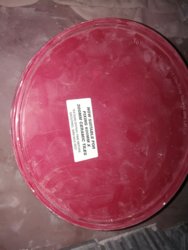
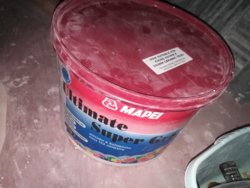
it says on a sticker that it can be used on tiles 300x600 its as if it was an update on the adhesive without changing the actual bucket info. this was bought from b&q and i can provide the sticker on lid if you require.

going back to my initial problem what issues might i come across?
I would suggest cutting your loses now and remove the tiles before they fall off and injure someone...bucket adhesive on dusty un-primed walls is never going to end well.
 
M

mr angry

hi guys,

unfortunately for me ive already started with the tiling and to remove them now would send my wife into a fit. mainly due to me taking so long and also doing all the work myself :(

if i continue as is what should i look out for if these decide to come loose? are there any given signs beforehand or is it a case of smash, bang, whallop at anytime. is there a test i can do to see if they are solid enough or stuck properly?

its the b&q tiles travertine ones (are they classed as stone?) and the ridged. this is what the staff member recommended when i was buying the stuff. i take it im using the wrong stuff for these type of tiles?

here are some photos of where im at :)

IMG_20180827_122237.jpg IMG_20180827_122256.jpg IMG_20180827_122444.jpg IMG_20180827_122451.jpg
 
M

mr angry

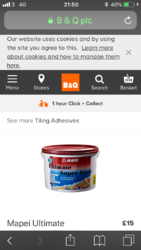
the guy at b&q recommended mapei ready mix and nobody mentioned anything about using a different adhesive for a certain tile. i did mention 2 weeks ago that i was putting batons up but i didnt think to mention or nobody said what type of adhesive are you using until i asked here about treating the walls and thats when andystiletelling asked about the adhesive.

how much force do i use if im to try and pull a tile off? ive done about 2/3 of the bathroom and the wall you see is the only one left. so is my diy job a lost cause? what do i do to try and salvage this?

will the adhesive take time to settle? do i leave it as is? will i start to notice tiles coming loose after several weeks? what are the given signs?

worried to say the least :(

cheers
 
S

Spare Tool

You've been given bad advise at B&Q, a cement based mix with water should have been used...however it does state on the sticker it is suitable and I would also like to hear Mapies take on this. Its the dusty unprimed walls that are the biggest concern imo, does it not mention the need for priming on the bucket? Imagine making dumplings and you sprinkle flour to stop the dumplings from sticking to the chopping board, same issue with your walls in a roundabout way. Try a scrapper under a corner of one of the first tiles you fixed, if that just pops straight off then your in trouble...if it takes some force then you might be ok. If you think they're stuck ok and you want to risk leaving them up then leave them at least two weeks before grouting and give the adhesive half a chance to go off, and prime whatevers left before sticking any more tiles on..
 
M

mr angry

ive tried the scraper on a corner of tile and it seems ok, didnt see any movement but thats because the ones i tested (bath/shower area) has been set for about 2 weeks, these feel solid. i dont want to tap with a rubber mallet incase i break the seal behind tile....or should i? i understand what you are saying about the dust example. i did brush the walls down before hand but i guess maybe that wasnt enough for my job at hand, lesson learned there! hopefully all is well....fingers crossed lol

this might be a daft question but to help further issues down the line, is it possible to add a small depth of silicone into the spacing of tiles and then grout over the top, or is this a NO NO? my reasoning behind this is to stop further water getting behind tiles.

i have read that grout lets in water over time and this will no doubt weaken my setup if it somehow penetrates the walls or adhesive. i am using a 5mm spacer but looks bigger because of the chamfered edges of these tiles so it looks like a 6/7mm gap :/


cheers
 
M

mr angry

after checking a few tiles at the window area i had a few loose tiles which i took off to investigate. the window wall seems to have been made up of plasterboard and then a skim of brown plaster on top with a plastic wire mesh stuff inside it, downwards from window area, which is different from the side walls where this is made up of about an inch of white plaster, not sure if there is any mesh inside it but in comparison seems a lot thicker and better stability that the brown plaster on the window wall.

from where the tiles were loose there seems to be no mesh in this area towards the ceiling and side areas of window. when i pulled a few tiles off, the thin layer of brown plaster came away with the adhesive and was very weak however the rest of the wall seems intact and ok. im assuming that when this was done the need for this wire mesh was missed out left and right side of the window.

also, im not going to use the mapei super grip on last wall. so what stuff should i buy going forward from b&q or screwfix or anything else to help finish this job :)

thanks for your time guys :)
 
M

mr angry

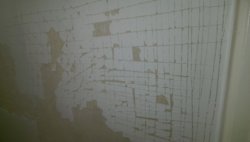
can anyone tell me if i can use bal white star plus ready mix adhesive and is it better than the mapei super grip? someone local is selling 7 tubs of it for £50 so was wondering if this would kill 2 birds if i dont need to prime the walls or would i still need to prime the walls if i purchased the bal stuff or not bother and buy the powder slow set stuff.

i also have an option with weber set rapid spf 20kg bags x 5 for £50 if thats better i can get that.

cheers
 
Last edited by a moderator:
Boggs

TF
Arms
Esteemed
4,728
1,118
Uk
That will be fine but is going to go off pretty quick.
A standard setting adhesive may be better if your not that quick tiling.
We use Tilemaster standard setaflex on walls, gives a few hours working time, but it’s used up before it goes off anyway.
 

Boggs

TF
Arms
Esteemed
4,728
1,118
Uk
I wanted to try that but nobody stocks it near me.

I buy direct from Tilemaster but you have to have it by the pallet.
I have used many adhesives in the past but find this one of the nicest to use and is the best blend of price/performance.
I use their Ultimate adhesive on floors, but you have to be really clean as you go, it’s sticks to everything and is a pain to get off when set!
 

Boggs

TF
Arms
Esteemed
4,728
1,118
Uk
@Waluigi

it was either the weber or the 7 tubs of bal white star plus. i was sure that the majority of folk here wouldve picked the 3 bags of weber stuff at £20.

i cant find a local supplier of the weber 360 but i can get the bal primer 1kg for £9.99 out of topps tiles is this ok to mix with weber?

That will do the job just fine.
 

Boggs

TF
Arms
Esteemed
4,728
1,118
Uk
i cant get to topps right now but can goto b&q later. can i use the mapei plaster primer £9 b&q?

cheers

Yep.
Whatever you use the result will be better than the other 3 walls with nothing on and pre mixed addy.
 
S

Spare Tool

I buy direct from Tilemaster but you have to have it by the pallet.
I have used many adhesives in the past but find this one of the nicest to use and is the best blend of price/performance.
I use their Ultimate adhesive on floors, but you have to be really clean as you go, it’s sticks to everything and is a pain to get off when set!
How'd you get an account with TM..like rocking horse sh#t?
 
M

mr angry

I ended up buying the unibond plaster primer from b&q as they didn't have any Mapei stuff in stock even though it showed 5 on their computers. Seems to be less dusty when wiping a finger down the wall so hopefully everything is all good :)

Can I use the remainder of this Weber rapid set stuff as a self leveler on the floor and is it flexible enough to use when I start the floor tiles?

Cheers
 
M

mr angry

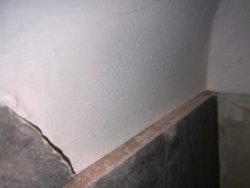
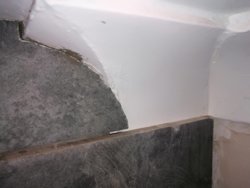
ive made an error of judgment when i started tiling the last wall as when ive lined up my bead to coving it looks like its going to stick out roughly about 1cm. it looks like i used too much adhesive and packed it out to much when tiling upwards due to the walls being off. the downside is that its gradually moving outwards and looks to be about a 1cm out past the bottom of the coving leaving a big lip.

i suppose i could remove the coving and re-do it with a slightly bigger replacement but are there other ways to blend this in without removal?

cheers
 
W

Waluigi

Remove coving. Cut a strip of 12.5mm SE plasterboard. Bond to the wall with drywall adhesive. Attach new coving. All materials are inexpensive.

Use different thickness plasterboard to suite your exact requirement. 9.5mm and 15mm board is readily available.

Not much you can do with it if you want to leave the coving on. Either finish the tile short of the coving or put a trim on the top of the tile. Or both.
 
M

mr angry

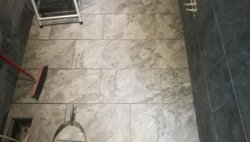
it looks like my floor has a slope of 1" from door to window. not sure how i missed that but im guessing its because i didnt use a batten at the time with my level :/

anyways can i use cement or mortar to bring the level up and screed the floor? im not sure how much stuff i will need but can i mix sand and cement as a base before i start tiling the floor?

please recommend what type of stuff to buy before i buy the wrong stuff :)

ive not had much time to do the bathroom lately so its just when i have time thats why it seems to be taking forever!

cheers
 
M

mr angry

hi guys,

been busy lately so the bathroom was put on back burner. i have since finished the tiling but i still have the issue with the coving at top. in a previous post someone mentioned a trim on the coving. can someone describe what this is?

i know someone also mentioned about using new coving over old coving....will i have any trouble keeping the old coving in place? the coving already installed, measures at 110mm, what size do you recommend to cover old coving?

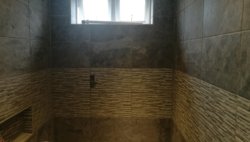
here are some photos of the tiling so far... and yes, the tiles still need cleaning up lol. also the tiles you see at left hand side which look off, is an actual access point/hatch and i need to cut a hole for the drainage too :)

thanks in advance!

thumbnail_IMG_20181119_124517.jpg thumbnail_IMG_20181119_124522.jpg thumbnail_IMG_20181119_124527.jpg
 

Dan

Admin
Staff member
5,128
1,323
Staffordshire, UK
This thread hasn't been replied to for 14 days, so replying to this one may not get a response. Post a new thread instead.

Reply to outside corner in rectangle bathroom in the DIY Tiling Forum area at TilersForums.com

Advertisement

TF on Facebook

...
Top