Herringbone Floor Tiling Set Out

One sides 450 i think the other side is 300 but i would imagine i can get the same result using it what you think 3?
Hahaha ok Ash think we must be talking cross terms here.
U asked where u could get a 90 degree set square yes?
Then u said u had a 45 degree square and could u use that, yes?
 
Yep, and i can see where i went wrong lol as u can tell mate im not good with angles something i need to get to grips with i think lol
 
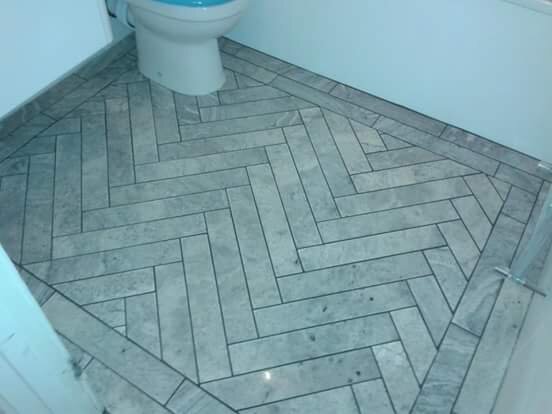
i cant get my head round it i want to do it like ali has done in that pic just without the boarder, but all need is the 45 degree of the triangle dont i?
 
Buy a simple carpenters square Ash.
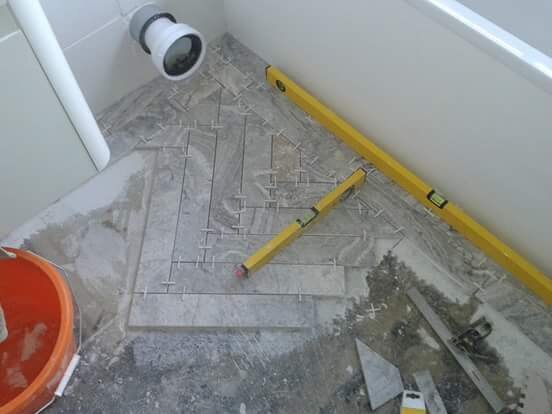
Use the 45 degree on it to mark a line a 45 degrees from the corner of a tile. Do this on a few. Find a centre line and lay the tiles to it so the centre line follows through the line on your tile.

If that makes sense
 
Buy a simple carpenters square Ash.
Use the 45 degree on it to mark a line a 45 degrees from the corner of a tile. Do this on a few. Find a centre line and lay the tiles to it so the centre line follows through the line on your tile.

If that makes sense
I cant picture it ali i should be ok been looking at some of the work so as long as i square up the room to the mm i should be ok with it
 
Not doing the job yet anyway just pricing and seing if it is do-able first but wanted to know how to set it out incase i get some samples
 
Do you just use one centre line ali? Or do you need one line each end of the tile? Seems it would be hard with just the one centre line if you know what i mean
 
DSC_0297.JPG
 
Last edited by a moderator:
And it wasnt every top right on the c line it was the top left of each tile if you know what i mean by that
 
Depends which corner you put your centreline through. Right hand tiles or in the pictures case left hand.

I just worked from that line out.
I'll see if I can find some progress pictures from that job.
 
Depends which corner you put your centreline through. Right hand tiles or in the pictures case left hand.

I just worked from that line out.
I'll see if I can find some progress pictures from that job.
Would be appreciated ali did you not find it hard just working to the one line? Seems it might be a bit hard as the tile isnt following the line on the run like
 
Would be appreciated ali did you not find it hard just working to the one line? Seems it might be a bit hard as the tile isnt following the line on the run like

Not at all. Made sure my border was set in perfectly level and more importantly square. So as long as you line splits perfectly centre 50/50 all the way from one side to the other.
Set my first cut at 45 degrees to the line (or border edge depending on how you look at it) and marked through my tiles with my square as mentioned earlier.
As long as the centre line runs through the top point and the line marked on the tile with the square then it's perfect.

As long as your measurements are spot on!
 
Last edited:
Just to mention (and not to cause a row) but this is a 1.5sqm floor, not the 25+ deano did in a day on site. I did this in a day and tool the same if not more than what 25sqm on site would pay.

See I think I can't do site through simply not being quick enough. That's because I lean more to the smaller details of tiling. I really enjoyed doing this because of the accuracy and intricacy of the floor.
I cut all the stone down from bigger pieces. Admittedly these were done the day before on the wet saw but only took about an hour.
The 45's I marked and cut with the grinder on site. Polished once fixed, sealed, grouted and a final Polish.
 

Advertisement

Thread Information

Title
Herringbone Floor Tiling Set Out
Prefix
N/A
Forum
Australia Tiling Forum
Start date
Last reply date
Replies
51

Advertisement

Tilers Forums Official Sponsors

UK Tiling Forum; UK

Thread statistics

Created
Mr Tiler,
Last reply from
kevsalt,
Replies
51
Views
19,345

Thread statistics

Created
Mr Tiler,
Last reply from
kevsalt,
Replies
51
Views
19,345
Back