One washboy tutorial coming up:
Fill the washboy with cold, clean water, so that it covers the grating by around 2-3 cm.
1. Wet/clean the sponge. If the float is dirty, you'll remove the "muck" by pressing against the grating.
2. Remove the excess water. Do this by going over the rollers with the sponge float once, then stopping with one end "flat" against the roller, and then "squeese" the end down on the roller, tilting the float to an angle of about 45 degrees. Repeat on the other end, and go over the rollers with the entire float again. If the sponge leaks water when going over the roller the last time, you need to repeat. You want the sponge float to be as clean as possible, and damp, not wet. To much water can damage the grouting mortar, making it brittle and unevenly coloured.
How to use the sponge float (my prefered technique):
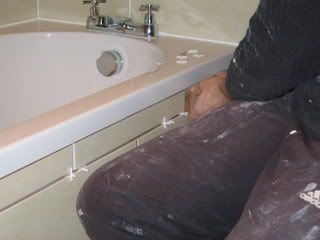
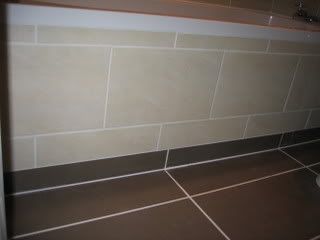
Only grout and clean one surface at a time, and if it is large, you may want to divide it into sections. Doing this ensures the grout doesn't dry up to much. Bear in mind that you don't want the grout to be too fresh/wet either. If it is too wet, the additional water on the sponge will weaken the grout. You have to find a compromise between ease of cleaning, and the amount of time you wait before cleaning, up to a certain point. Wait to long after application and the job will be botched. Wait to little, and the grout will crumble after a few months.
Always begin from the top, or you'll have to go over the entire thing again just to clean away drippage.
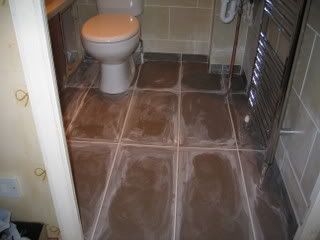
1. Go over the tiles in a circular motion with the sponge float. Your objective in this stage isn't cleaning, but to even out the grout.
The circular motion also cleans away the worst excess, but leaves enough to work with when cleaning. Clean the sponge as needed, but not too often. Fill out any gaps in the grouting as needed. Often, you just need to use a finger.
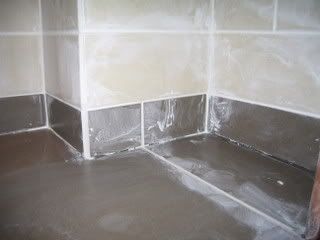
2. When the grout is fairly even, you can start removing the excess grout. Do this by pressing the float firmly against the surface, and going slooowly in a horisontal motion. Start from the top. Clean just as you start noting the float leaving as "track".
Any dirty excess water drips downwards, and by keeping the motion horisontal, you clean the drip up as you go.
If there is a "film" on the tiles, wait a few minutes for the grout to become a little bit dryer to the touch, and go over the surface lightly with the float. Make sure it is just damp with clean water. To much water may weaken the grout; dirty water is counterproductive.
Cleaning grout is about finding a good compromise between speed and the quality of the result, which works for you and your way of working. Some techniques require loads of time, but produce perfect results, and vice versa.
I find that my technique is sufficiently fast for the most part, and the result is as close to perfect I can get within a reasonable amount of time.
When you're done grouting, empty the water somewhere you don't risk causing a blockage. In the bottom of the washboy, there will be a layer of cement. If it's new, it'll be lose, and you can scrape it out, or wash it out with a hose. If it's been there for a day or so, or if you've been doing lots of grouting, then you can "tap" it out, by putting the washboy upside down, and tapping with the handle of a trowel round the edges. Do not tap in the middle, as you might crack the plastic if you tap too hard.
I might add a few things later.
Cheers.
EDIT: Updated with a few clarifications