Looks better the further away you stand. But for a first go I am delighted. Thank you for your reply and help with my next 'challenge' too.
So....
As a first time DIY tiler things I have learned, some of which I already knew.
There were things i knew and had planned for these were the bits I overlooked and then corrected.
1. When you space the guide lines don't forget to allow for the SPACER too. Yes I really did make that mistake on my initial line draw.
2. Cut out every single tile prior to starting to fix.
If one is 'out' then having the existing tile as a reference makes it so much quicker to redo.
3. You need a few tools you are unlikely to use again except on another tiling job. Grout float and notched trowel for example. If this is a one off consider just getting a pro to do it. It's likely your costs on the job won't be that different.
4. However long you are thinking the job will take. It will take longer! Each stage is quick. But the prep and cleanup between each stage is vitally important and eats time.
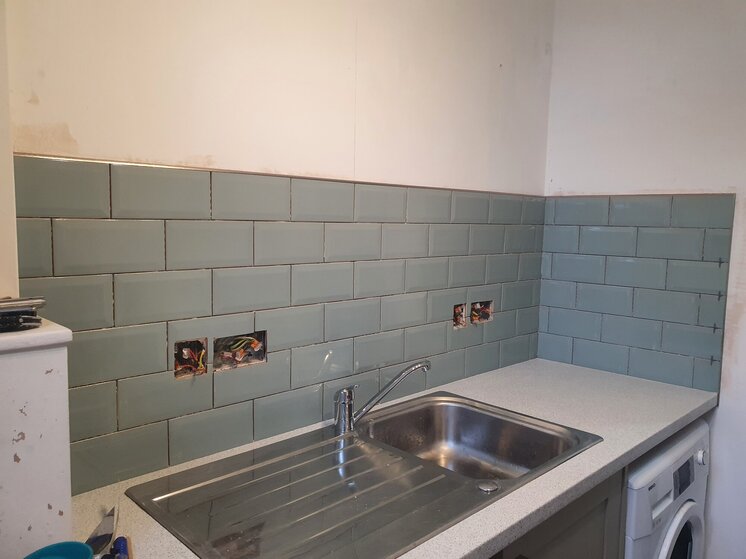
5. Cutting around close together sockets required specialised cuts in the tiles that even my wet saw wouldn't do.
Solution was a dremmel with grinding disks and patience.
6. Don't be shy with the adhesive. Pile it on and cut it back with the trowel. The will avoid and low or blank spots that a thinner layer was giving me.
6. Don't let your first job be bevelled metro tiles because...
A. Edging bevelled tiles is a challenge. The vertical side where they are cut is a different thickness to the horizontal. Also the thickness is different when cut tile to where it is whole.
Solution for the edging was to use a 6mm round edge on the horizontal. Then a 10mm square flat edge on the vertical. I filed the vertical edging strip so it ran nicely into the horizontal.
B. There is no way to get a tidy internal corner.
Solution is always to Silicon bead. Or so I have read.
C. They are difficult to level. Or with one job experience that's my take on it. One might say that the different levels of the tile hide the sins of any errors.
Things that were easier than I expected.... Attaching the tiles to the wall.
Making it look half decent.
Anyway that's my run down... pre grouting. Hope it helps someone. Any questions for a complete amateur feel free. Although probably better to ask the experts on here like I did.
Thanks for your support, really appreciate the assistance.
Oli.