Tiling around arcs and curves

UK Tiling Forum; Established 2006

Welcome to the UK Tiling Forum by TilersForums.com, built in 2006 by Tilers, run by Tilers.

View all of the UK tiling forum threads, questions and discussions here.

Tilers Forums Official Sponsors

D

Dave Ramsden

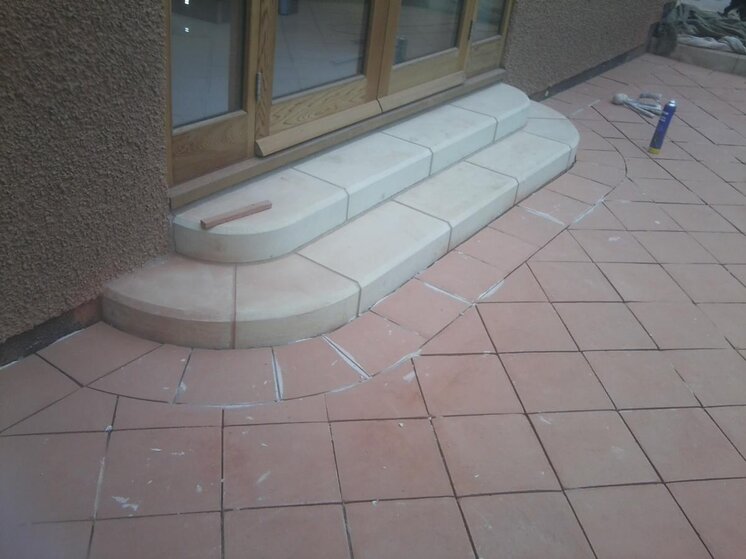
Im currently installing some terracotta and have some curved planters to run a border around.
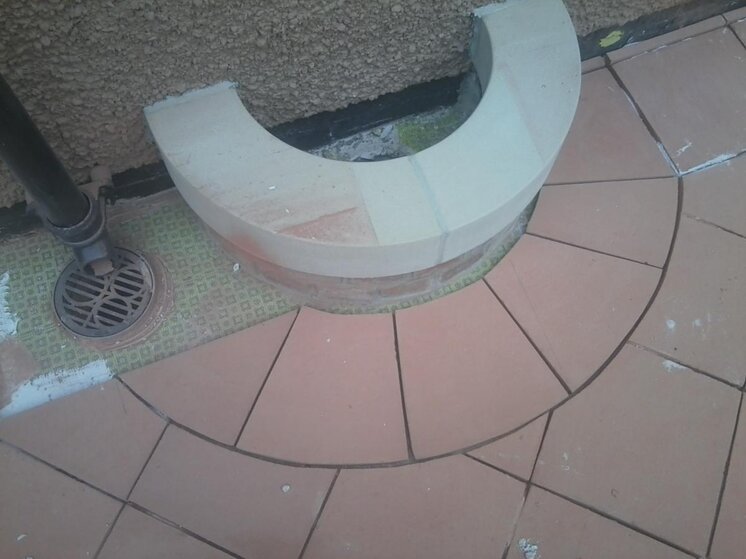
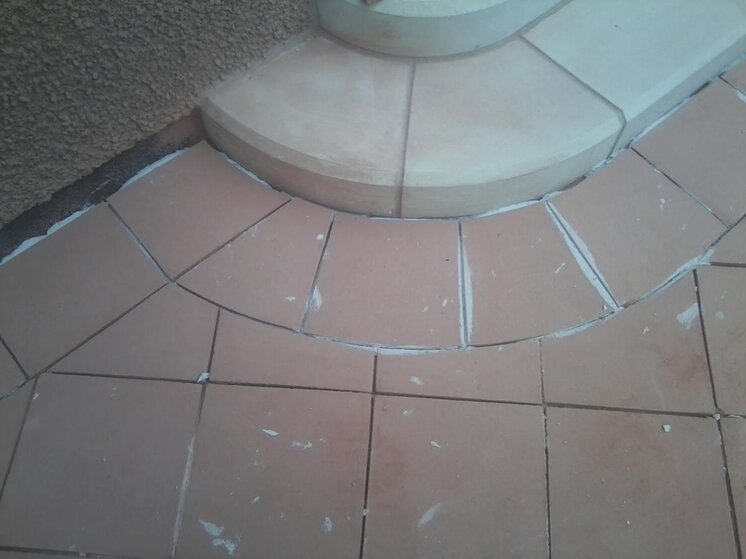
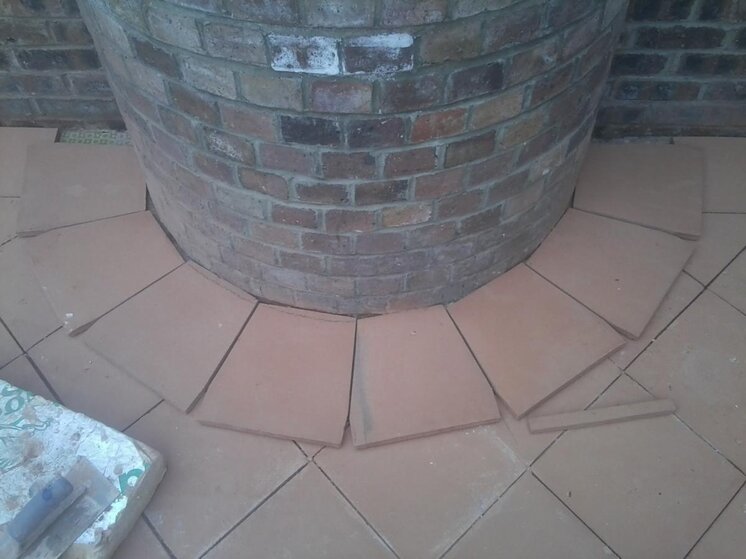
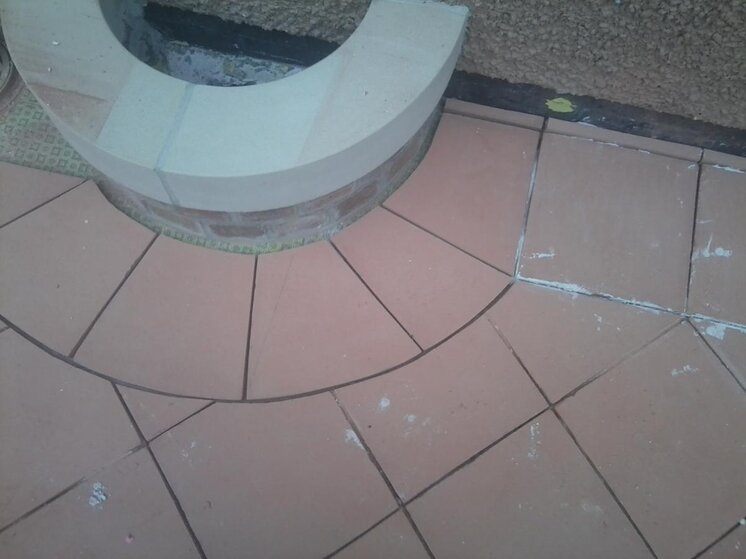
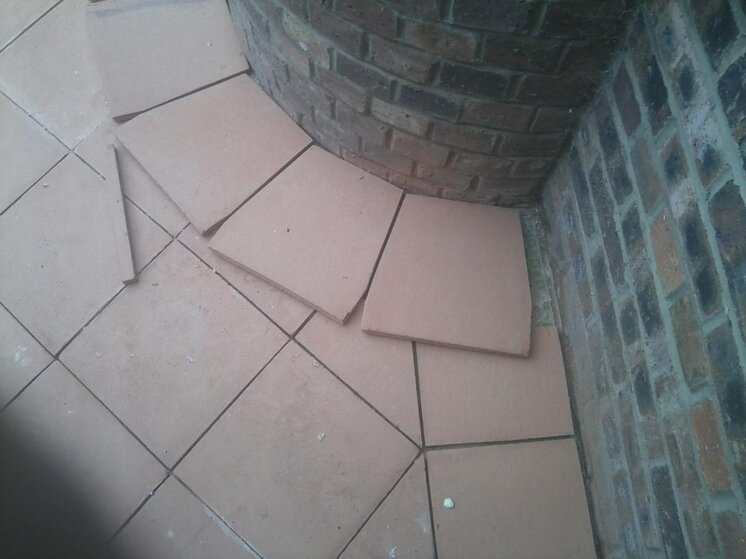
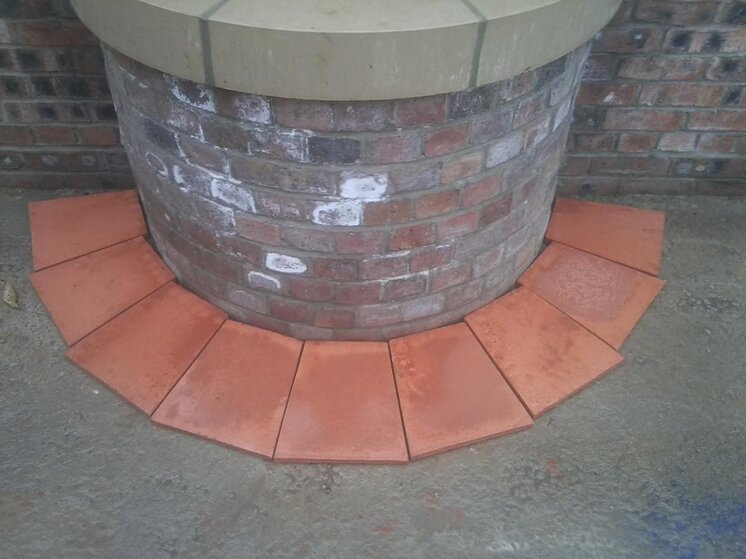
Ive included a picture of the planters and some on how I have set one out. There is a smaller planter thats already tiled around.
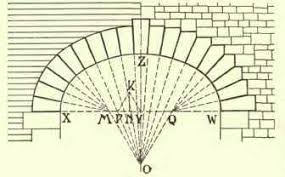
Im still playing with the design, I just wondered if anyone had any advice of tips to speed the process up a bit??
 

Attachments

  • Photo0126.jpg
    Photo0126.jpg
    83.3 KB · Views: 215
  • Photo0128.jpg
    Photo0128.jpg
    64.6 KB · Views: 123
  • Photo0123.jpg
    Photo0123.jpg
    84.6 KB · Views: 120
  • Photo0125.jpg
    Photo0125.jpg
    67.9 KB · Views: 100
  • Photo0129.jpg
    Photo0129.jpg
    64.1 KB · Views: 99
  • Photo0127.jpg
    Photo0127.jpg
    84.2 KB · Views: 104
  • Photo0124.jpg
    Photo0124.jpg
    88.8 KB · Views: 105
That is how I would do it Dave, the wedge shaped pieces are called Voussoir, if you measure the Intrados ( inner circle) then measure the Extrados ( outer circle) divide inner and outer circles into equal measurements, eg. 10 Voussoir, 15 Voussoir, 20 Voussoir and so on.

This will determine the exact size of each Voussoir, just the same way you would set out an arch. You can use this method for a circle, semi-circle or anywhwere in between. Hope this makes sense, going back to my building college days, it does come in handy now and then.:thumbsup:
 
ooo you may have just saved me days of marking by eye, I have several of these things to cut round!
 
Hope that made sense Dave, you could maybe google voussoir, you might find some drawings that explain it in more detail.

Stonemasons probably use this more than us tilers, but I have used it a good few times myself, I am a mine of useless information:thumbsup:
 
I collar'd the stone mason who said most stone sets come pre-fab these days. He suggested carrying on as I was (doing it by eye and tweaking) but it was really beginning to test my patience!

Ive got it in my head now and will try it first thing in the morning, in the mean time Ill be checking google too! :thumbsup:
 
Hi Dave, that all looks nice. If you are comfortable using trig and some basic algebra and geometry, there are some neat ways to figure out the arc lengths and radii for the curves. Then, with a flexible piece of metal that is cut to the length the required arc, you can spring the metal into position so that it will create the arc, which you can then trace on to the stones or tiles that need to be cut. I use these methods from time-to-time when fabricating wood trim that is curved.
 
Hi Dave, that all looks nice. If you are comfortable using trig and some basic algebra and geometry, there are some neat ways to figure out the arc lengths and radii for the curves. Then, with a flexible piece of metal that is cut to the length the required arc, you can spring the metal into position so that it will create the arc, which you can then trace on to the stones or tiles that need to be cut. I use these methods from time-to-time when fabricating wood trim that is curved.

Trig, algebra and geometry........ And the call us "just tilers" the cheek of it....(;0)
 
Hi Dave, that all looks nice. If you are comfortable using trig and some basic algebra and geometry, there are some neat ways to figure out the arc lengths and radii for the curves. Then, with a flexible piece of metal that is cut to the length the required arc, you can spring the metal into position so that it will create the arc, which you can then trace on to the stones or tiles that need to be cut. I use these methods from time-to-time when fabricating wood trim that is curved.

Thanks Rob! Using a flexible metal gauge of some sort would also be a good way. Im going to try Phils method first and as there are quite a few of these to do I may try this too :thumbsup:
 
Cheers Gary!
Ill post pictures when its complete, hopefully Ill be allowed to enter into JOTM though the weather has ben costing me more days off than on!
 
This is an old way but .if its a true radius ,mark it out in a blank area (the radius) lay a couple of tiles on the radius line then position a string or use a strait edge one end positioned at the centre of the semi circle .(i norm do this with a chalk line) take line out to leading edge of tile that should give you the angle required to make the header coarse
hope you understand not easy to explain
 
I have also used Robs method, and it works well, there is no right or wrong formula, as long as you get the desired end result:thumbsup:
 
And Jays.:thumbsup: Nice one Jay, we are a real set of clever beggars, are we not:lol:
 
Yes Phil the brickys were taught at the same teck so we crossed over some of their ways too was interesting .not sure about these days mention a header coarse and you get a blank look
 
Went back this morning, made on Voissois as a template and replicated it 9 times. Laid them all aout around the planter and they run in fine!!

Theres about 9 of these planters and they all measure the same so I marked up a load of tiles and ran them through the dewalt (two at a time, 20mm thick each). I had all the tiles perfectly sut inside 20 mins.

Massive thanks to all who helped on this one!!
 

Advertisement

Thread Information

Title
Tiling around arcs and curves
Prefix
N/A
Forum
UK Tiling Forum
Start date
Last reply date
Replies
22

Thread Tags

Tags Tags
tiling usa

Advertisement

UK Tiling Forum

Thread statistics

Created
Dave Ramsden,
Last reply from
Dave Ramsden,
Replies
22
Views
13,302

Thread statistics

Created
Dave Ramsden,
Last reply from
Dave Ramsden,
Replies
22
Views
13,302
Back