Search the forum,

Discuss Book Match Porcelain Veins in the Printed Sheets in the Canada Tile Advice area at TilersForums.com.

W

WetSaw

Wow I'm absolutely blown away by the workmanship here.......this really is world class tiling guys!.......well & truly putting porcel thin on the map here!........I was looking forward to you posting your next porcel thin job Marc after viewing your last one but I didn't expect this!......inspirational tiling!!......

... I thought the same, first porcelthin job in December and now this. That's some learning curve!!!
 
R

Rizzle from the Portizzle

Meticulous planing.
"Plan your work and work to your plan"
Well done lads, what a picture!

heres the man putting his back in

DSC09835.JPG DSC09836.JPG
 
L

LM

I have to say Ray you's boys are quite a bunch!
From what I can see you's are definitely at the forefront of things, well done to all envolved and thanks for sharing this with us.
I'm sure all would agree that just by even looking at your work in action we're all learning small bits and pieces at the very least.
I for one have never worked with porcil thin so it's all a Marvell to me.
 
O

Old Mod

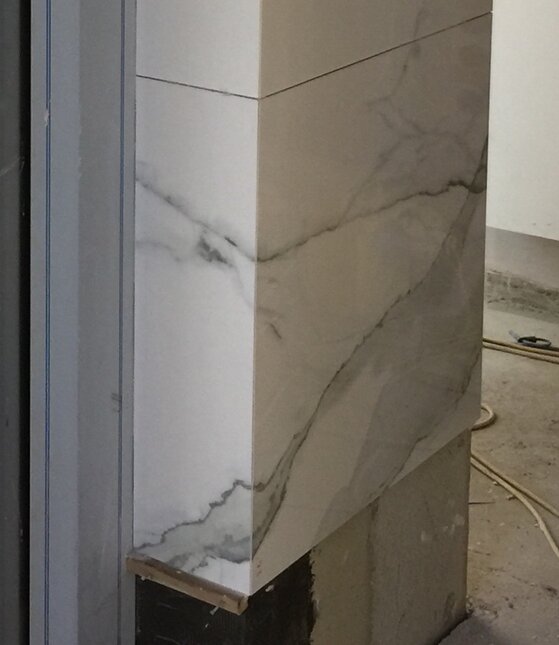
For anyone whose curious, as was @Protiler 68, this is how the mitred corners are formed.
U do need to work quite a few pieces ahead of yourself so that u know where each piece goes and that you can get it to match all the way thro.
And as in this case, u also have to consider, how it may impact the floor.

Starting with the whole piece cut each section to size and make good all the cut edges and then mitre them and make sure it all lines up.
This piece is eventually going to end up as the first full tile from the floor on the bottom fight side of the lift column.
These pieces have been prepped, all that remains is to fix the right hand piece to the column face and then cut the left piece to length to fit the reveal.

image.jpeg

And this is it finished.

image.jpeg
 
I

Italy

For anyone whose curious, as was @Protiler 68, this is how the mitred corners are formed.
U do need to work quite a few pieces ahead of yourself so that u know where each piece goes and that you can get it to match all the way thro.
And as in this case, u also have to consider, how it may impact the floor.

Starting with the whole piece cut each section to size and make good all the cut edges and then mitre them and make sure it all lines up.
This piece is eventually going to end up as the first full tile from the floor on the bottom fight side of the lift column.
These pieces have been prepped, all that remains is to fix the right hand piece to the column face and then cut the left piece to length to fit the reveal.

View attachment 81083

And this is it finished.

View attachment 81084
:eek::eek::eek: write on porcelain !!! :)
 

Reply to Book Match Porcelain Veins in the Printed Sheets in the Canada Tile Advice area at TilersForums.com

There are similar tiling threads here

Hi! I'm looking for some advice, I have laid some SLC (Mapei 1210) in our conservatory in...
Replies
5
Views
629
I had a small leak in the main water line before the stop tap in my 1950s house. The copper pipe...
Replies
1
Views
659
Good morning all. After a little advice. I'll post pictures a bit later. However.... The...
Replies
6
Views
905
Posting a tiling question to the forum? Post in Tilers' Talk if you are unsure which forum to post in. We'll move it if there's a more suitable forum.
Please visit our sponsor websites, they keep the forum free to use!

Advertisement

New Tiling Questions

Replies you've not seen

Top