Search the forum,

Discuss Grinding / Polishing / Small chips in the DIY Tiling Forum area at TilersForums.com.

J

Julian 'Farmer' Bonsall

Hello
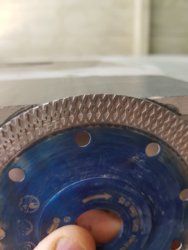
When cutting ceramics with my table saw (Wet Saw, 180mm disc, MARCRIST DIAMOND TILE BLADE from screwfix) I get some small chipping to the glaze. On a recent kitchen I moved to cutting almost all tiles with a grinder as it was much quicker (using either a ck850 or Protilers blade) but there are still small marks on the glaze. I used the side of the cutting edge to remove the very small amount of tile to remove this unwanted edge.
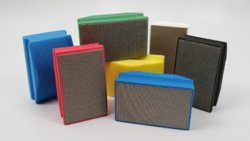
I noticed on the forum various grinding pads and wondered if a set would be useful for my toolbox. I was looking at something like this :
Sigma Diamond Grinding Pads (multiple grits available) | Buy Sigma Tile Cutters Online from Pro Tiler Tools - https://www.*******************/product/sigma-diamond-grinding-pads--multiple-grits-available-
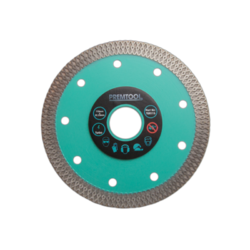
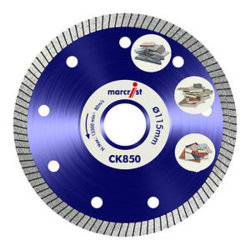
turbo blade nt14122017101258.png s-l300.jpg
 
C

Concrete guy

What you linked to are dry diamond polishing pads. Designed predominantly for polishing granite and other hard stones. The key word here is "polishing".

You'd be better of buying some electroplated diamond hand pads, many of the tilers on this forum use them, either ours or bought from eBay or from Protiler tools. They all do the same thing.

(I can't post links it breaches the advertising rules of the forum - but they are easy enough to find).

Even if you did feel like setting yourself up with some polishing pads for a mechanical polisher. For what you guys do (tilers that is ) you'd be hard pushed to better Silicon Carbide discs. Mainly because they work on pretty much everything you're going to come across and it's only small volumes of edges you're ever going to be polishing.

The advantage of diamonds really kicks in with volume. If you're polishing hundreds of linear meters of product on a daily basis then it makes a lot of sense. That said you'd have pads for marble, pads for granite, pads for quartz and pads for porcelain.

So the average tiler (and I know there are a lot of tilers here that are above average!) will do everything they need to do with some hand pads and silicon carbide discs (if they have the need to invest in a polisher).
 
C

Concrete guy

Note for the more "experienced" ;) members of the forum that Silicon Carbide is also known as Carborundum.

So you may have come across solid black rubbing blocks of this stuff for all sorts of uses. Mainly they were used for cleaning tools but they work equally well tidying the edges of tiles up.

It's pretty much the hardest thing available bar Diamond.
 
J

Julian 'Farmer' Bonsall

ATS - thanks for your reply thats very helpful. I've posted a photo of what I think you mean. What I have tried to use is some 400 Grade Wet and Dry (also Si Carbide) from my playing with car paint work. It was just a little slow and being a paper not suited to tile edges.
Is there any type of grinder option available (I have never used the blocks) or, even if there is, any point to one? (i.e. is the hand block quick?). At the moment I run two grinders and pop the cut tile onto the second one with a cheaper disc in it just to take the cut edge off, but its really far to aggressive.

So really a solution for the cut edges of a glazed tile. (Electroplated Diamond Polishing Grinding discs - ATS Diamond Tools - https://www.atsdiamondtools.co.uk/product/electroplated-diamond-polishing-grinding-discs/) (115mm Electroplated Diamond Grinding Disc - ATS Diamond Tools - https://www.atsdiamondtools.co.uk/product/115mm-electroplated-diamond-grinding-disc/).

I can see a tool that is rigid is needed for my needs but not at all sure quite how aggressive the tool needs to be.

hand-pad-electroplated-diamond-stone.jpg
 
C

Concrete guy

I have to tread carefully here Julian as I'm not a forum sponsor.

The hand pads pictured above are ideal for tilers, they are quite rigid and ideal for tidying up edges of envelope cuts, that kind of thing.

The #50 is quite coarse. Most tilers are going to be using #100, #200 or #400 grit pads or a combination.

Velcro backed discs are a stonemason/concrete product, basically a version of the hand pad that can be attached to a polisher. You'd be using that on thick edges (20mm/30mm) or surfaces and as such are a bit aggressive for ceramic and porcelain tiles.

The electroplated grinding discs we brought in due to demand from tilers. They are #120 grit and a general purpose tidying/finishing tool.

It's also worth noting that the grit numbers for silicon carbide and diamond are not algined.

Diamond pads run generally from 50-3000 grits, above that they are variations of buffing pads, 5000 grit and such.

Silicon Carbide run from #36 (extremely coarse) to #1200 (used by glaziers for polishing glass).

So a #400 Silicon Carbide isn't grinding, it's polishing. As impish mentioned above, you'll need #60, #80 or #120 for shaping and light grinding. #120 probably being the most versatile and used SiC grit disc.
 
Last edited by a moderator:
J

Julian 'Farmer' Bonsall

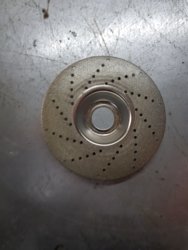
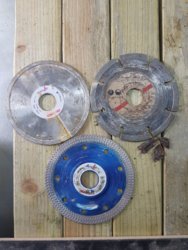
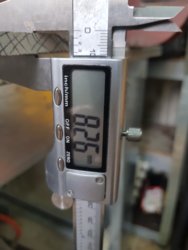
So I purchased an electroplate 115mm grinding disc. I had an already cut floor tile (with glaze chips) to try the new tool out on. I also compared a segmented blade (for stone cutting), a Marcrist CK650SF (110mm x 1.7mm), and a Marcrist CK650 (115 x 1.1mm).

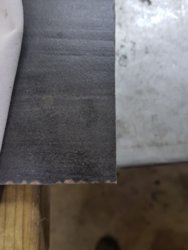
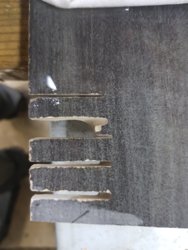
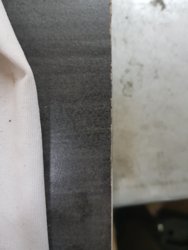
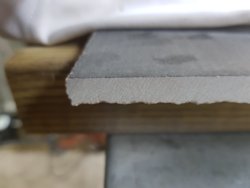
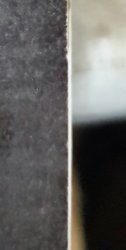
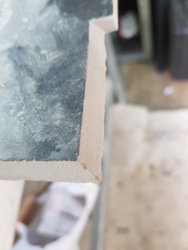
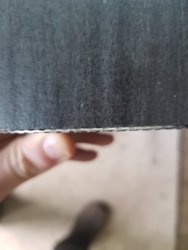
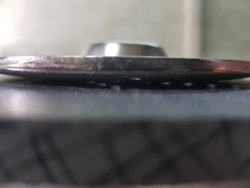
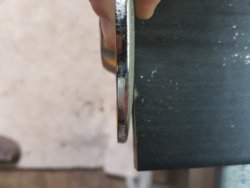
Images : Grind disc, 3 x cut discs, precut floor tile, cuts with 3 blades, after grind top, after grind cur face.

I did attempt the wet sponge (you may see damp tile) but I don't think I had it wet enough.

I have found an issue with the grind disc. If the direction of grind is from the glazed surface towards the biscuit its very good (I am not quite so keen on the actual shape of the disc - flat would be my choice) but if one grinds from biscuit to face then I had some surface chipping. I am not sure if this would happen with a pad/paper solution. Where you have an 'L' in a tile it could be tricky to always grind from the glaze.

20180407_170423.jpg 20180407_170419.jpg 20180407_170807.jpg 20180407_171645.jpg 20180407_170931.jpg 20180407_170814.jpg
 
Last edited by a moderator:
C

Concrete guy

I have found an issue with the grind disc. If the direction of grind is from the glazed surface towards the biscuit its very good (I am not quite so keen on the actual shape of the disc - flat would be my choice) but if one grinds from biscuit to face then I had some surface chipping.

That's quite normal, think of it the same way you would cut a piece of timber, you always cut into the finished surface so it's doesn't splinter. As opposed to cutting up through the finished surface

A flat blade would be unforgiving, they are called electroplated vanity blades and designed more for marble and other soft materials.
 
J

Julian 'Farmer' Bonsall

@Localtiler understood and thank you. I will give the sponge some more practices. I would much prefer a bigger 150mm disc and maybe have more space for the sponge.

The thin slot you see was done with a wet sponge and slowly (they were all done as I normally cut) I also wet the tile with a small puddle around the blade as I was struggling with the sponge, I should have videoed it really (even for comedy value) - I chose that tile as it chips like no other (and being a dark tile I thought better for images) I have cut and it was to demonstrate the new electroplate grinding disc. One of the cuts is completed with a blade normally used for motor and brick work.
I chose the CK650 over a Premtool Turbo Fastline as I took it as preference on the kitchen I did recently. I can repeat with the Premtool blade if necessary.

thin.jpg grind.jpg
 
J

Julian 'Farmer' Bonsall

A flat blade would be unforgiving, they are called electroplated vanity blades and designed more for marble and other soft materials.

Thanks for the quick delivery and the help and advice. It does just what you suggested - as hopefully can be seen it cleaned up the badly chipped tile a treat.
I don't understand what you mean by a flat disc would be unforgiving? I have always used the side of a disc in the past to clean up the edge which is flat? I have in the past held the tile perpendicular to the disc and removed the biscuit until I get a clean face on the glaze. Maybe that is not correct? With the curved face this technique would seem to not be the best.
 
J

Julian 'Farmer' Bonsall

@Localtiler ok think i understand - but that's how I have use the side of my cutting disc to grind in the past. Disc perpendicular to the tile surface, disc touching biscuit and ultimately glaze - outer radius/rim of the disc slightly protruding the glaze. It has worked well for me but my concern was I am wearing out the side of a blade in a way it wasn't meant to. With a backing pad / paper are they not used in this way? Or are they used at an angle across the tile face? Sorry for not understanding.
 
J

Julian 'Farmer' Bonsall

Sorry to be thick but isnt that whats happening when I use the side of a cutting blade? Why is that a bad thing? (you can always move the front or back face away?). A 125mm disc will only touch on the coated band and if the blade is circumference is slightly protruding the surface of the tile then there wouldn't be a lot of contact (depending on tile thickness) ?
Would a video of how I use the blades help to explain what I mean?
I just felt I would want a flat blade but maybe I am not using it correctly?
 
O

Old Mod

Would a video of how I use the blades help to explain what I mean?

Yes it would.

You keep saying you hold the blade perpendicular to the tile, and that you’re using the side of a cutting blade to tidy an edge.
That would mean you’re holding the blade parallel to the tile
To hold something perpendicular, would mean to make a T shape with blade and tile.
And if you are ‘toeing’ in the front of the blade, or indeed the back as you describe, then a slightly convex blade would do this for you.
Which is exactly how the grinding blade is designed.
These processes don’t take 5 mins on a sat afternoon to perfect, they take time and many lineal metres to get even half right.
As far as blade catching the glaze on the ‘up stroke’, of course it will, that’s not a revelation.
Any kind of sanding/polishing action is done in the direction of the grain and with the rotation of the blade. You should move in one direction, so that the downward rotation cuts through the glaze first and then the biscuit.
It’s no fault of the blade that it catches the glaze on the way back up, it’s down to incorrect technique.
Sorry if that sounds harsh, but that’s what it is, incorrect technique.
If you can make a flat blade work for you, then that’s great.
And every single tile behaves differently to the last, if they didn’t, then we’d all use the same blade, but we don’t
The effectiveness of any blade is down to two things, material and technique.
There is no one answer, it’s a subject that changes every day, with the introduction of different materials and different blade technology.
 
Last edited by a moderator:
J

Julian 'Farmer' Bonsall

The disc is perpendicular to the tile (being the workpiece. Tile is held as shown in the images - glaze forms 90 degrees to the disc. If one uses any form of chop/sliding saw you typically set the blade at 90 degrees to your work piece ie perpendicular. I usually hold the blade stationary and move the work piece along it.

" Disc perpendicular to the tile surface, disc touching biscuit and ultimately glaze - outer radius/rim of the disc slightly protruding the glaze "

I will take some images as it will be safer than a video.

I suggested that the axis of the blade could be rotated to allow the front or rear to touch - I hold it so all axis are kept perpendicular to the tile so I grind it flat (seemed logical to me rightly or wrongly).

The way I have used the side of a cutting blade such that it is flat across the face of the tile was purposeful rather than using it at an angle which is a little how I feel the convex blade is behaving. As you can see from my images it works but it's different to what I was used to. How do you keep the cut face of the tile flat with the curved disc?

Moving to the silicon paper / flex backing pads - are these used at an angle to the face of the tile also?

I appreciate your help 3_fall and hope I haven't caused more greyness I am sure it's frustrating reading.

I have been tidying the edge of tiles up as I describe for a lot of years and maybe I have been doing it wrong and now a little confused.
 
Last edited by a moderator:
O

Old Mod

There’s no right or wrong way ultimately, if your technique works, why second guess yourself and change?
I can only see a benefit in changing methods if it drastically reduces working time.
Other than that, why bother.
As I said, every material is different, working with thin tile this is never more evident.
What blade will give a clean cut on one, generally doesn’t on another.
Bolstering my belief that every manufacturer needs a specific blade for their material, change material and use the same blade, it’ll mostly gives an inferior cut.
 
J

Julian 'Farmer' Bonsall

Tom - that particular floor tile was a stand out problem from tiles I have cut previously and selected due to the easy chipping and the dark colour to show the effect of the electroplate blade. The original cuts were done with a wet cutter using a Marcrist 180mm blade (Sorry I cant remember exactly which variant - its was from screwfix)

These cuts were done with a battery grinder as a way of showing what effect the new tool (the Electroplate grinding disc).

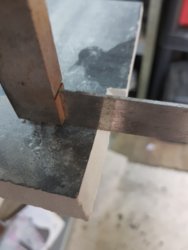
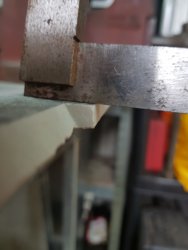
The close up images of a cut with minimal chips was done wet with a CK650 blade (almost new) in a battery tool. The mitre cut I have shown was done with the same blade which I dont think look bad? Or are they?

20180408_125539 - Edited.jpg
 
J

Julian 'Farmer' Bonsall

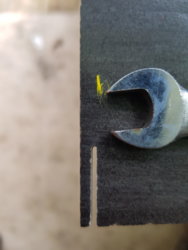
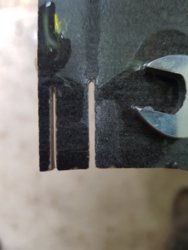
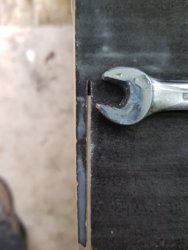
Well I wanted another try at the wet sponge method and also to use a makeshift water lubrication system. I was going to try the Silicone Carbide discs but I incorrectly set up my polisher which destroyed the back pad in less than a second.
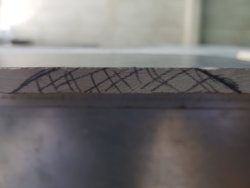
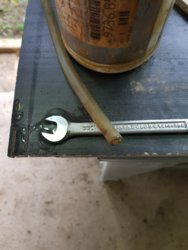
First is a dry cut (spanner for scale, yellow paint to help the camera focus).
Second a wet cut using a water flow to the front of the blade.
Third was with a wet sponge. I used a thinner sponge (not a car type, much thinner) and it worked a treat. Make sure you have the guards on properly.

I also tried some Production 120 Wet and Dry paper (a low cost brand), in a flexible sponge wet block. It appeared to remove the glaze (biscuit much easier) slowly but left a nice edge - a patient process.

20180413_143904.jpg 20180413_144343.jpg 20180413_144800.jpg 20180413_144417.jpg 20180413_144545.jpg
 
Last edited by a moderator:

Reply to Grinding / Polishing / Small chips in the DIY Tiling Forum area at TilersForums.com

Make sure to mark a post as a solution for better transparency.
Posting a tiling question to the forum? Post in Tilers' Talk if you are unsure which forum to post in. We'll move it if there's a more suitable forum.

Advertisement

Top