Discuss Small kitchen tiling job for a newbie - suggestions appreciated in the DIY Tiling Forum area at TilersForums. The USA and UK Tiling Forum (Also now Aus, Canada, ROI, and more)

Reaction score
17
While I'm waiting for tradesmen to see to my bathroom, I'm going to finish this job. Please excuse any totally stupid questions.

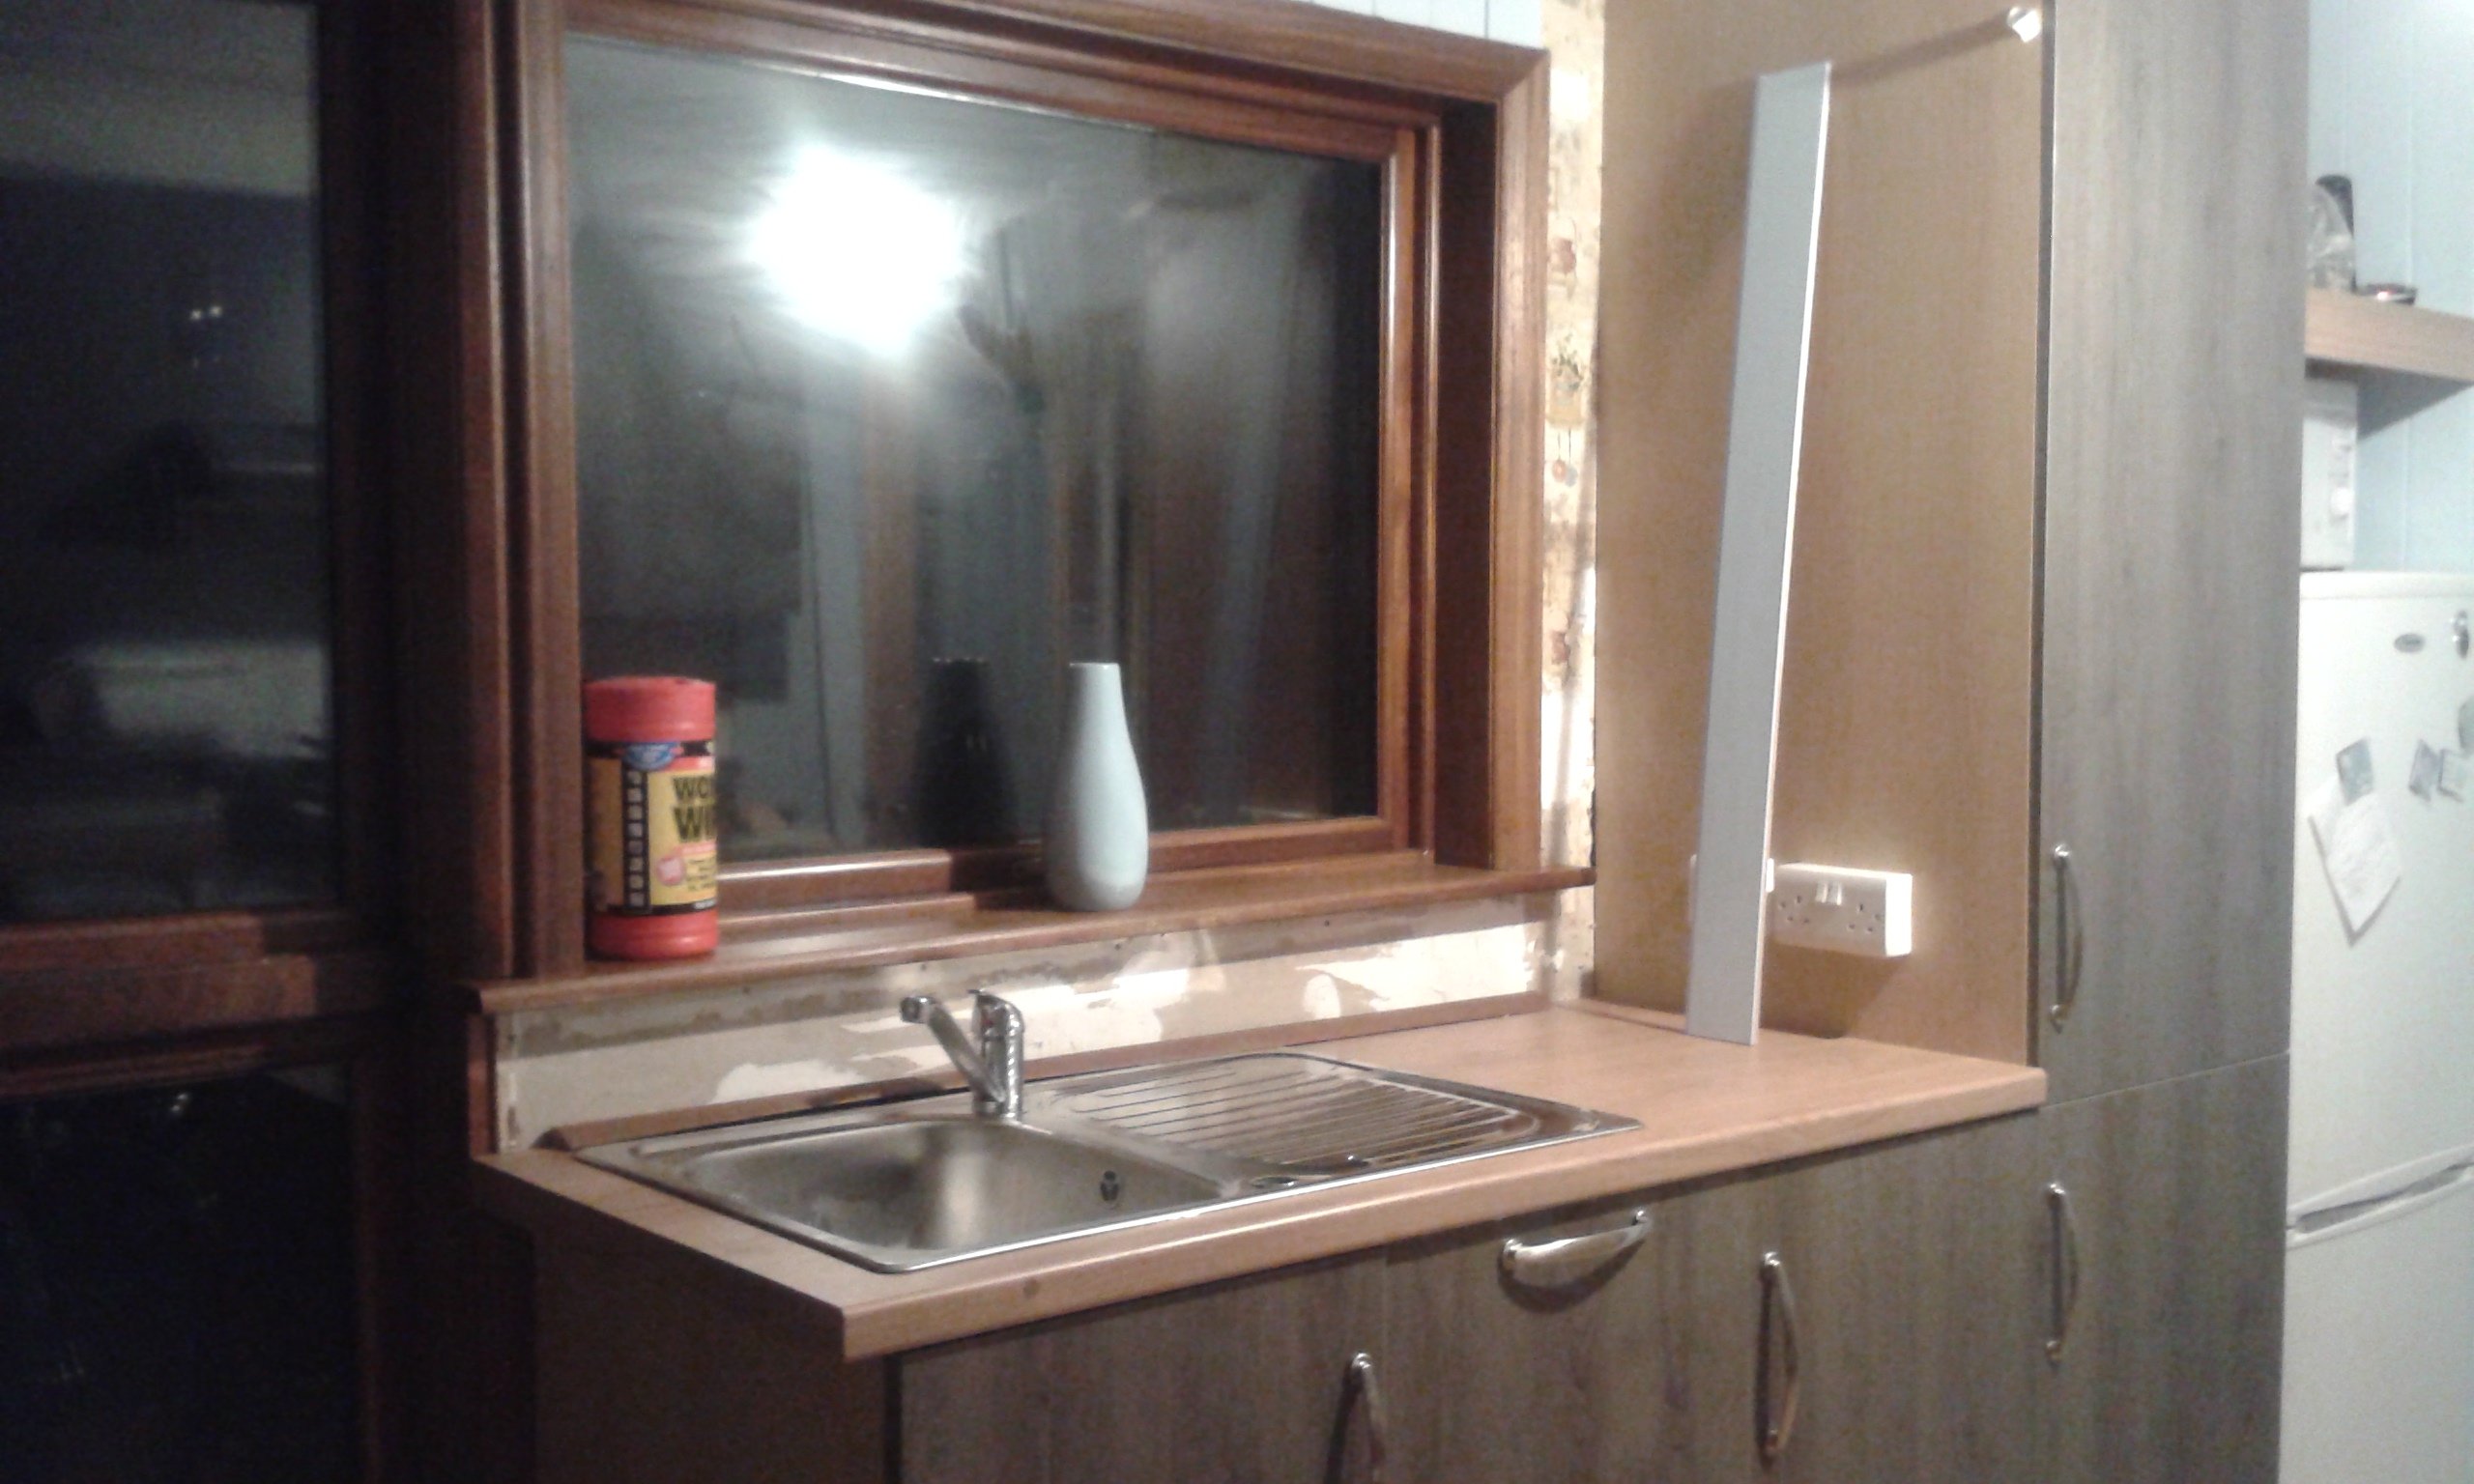
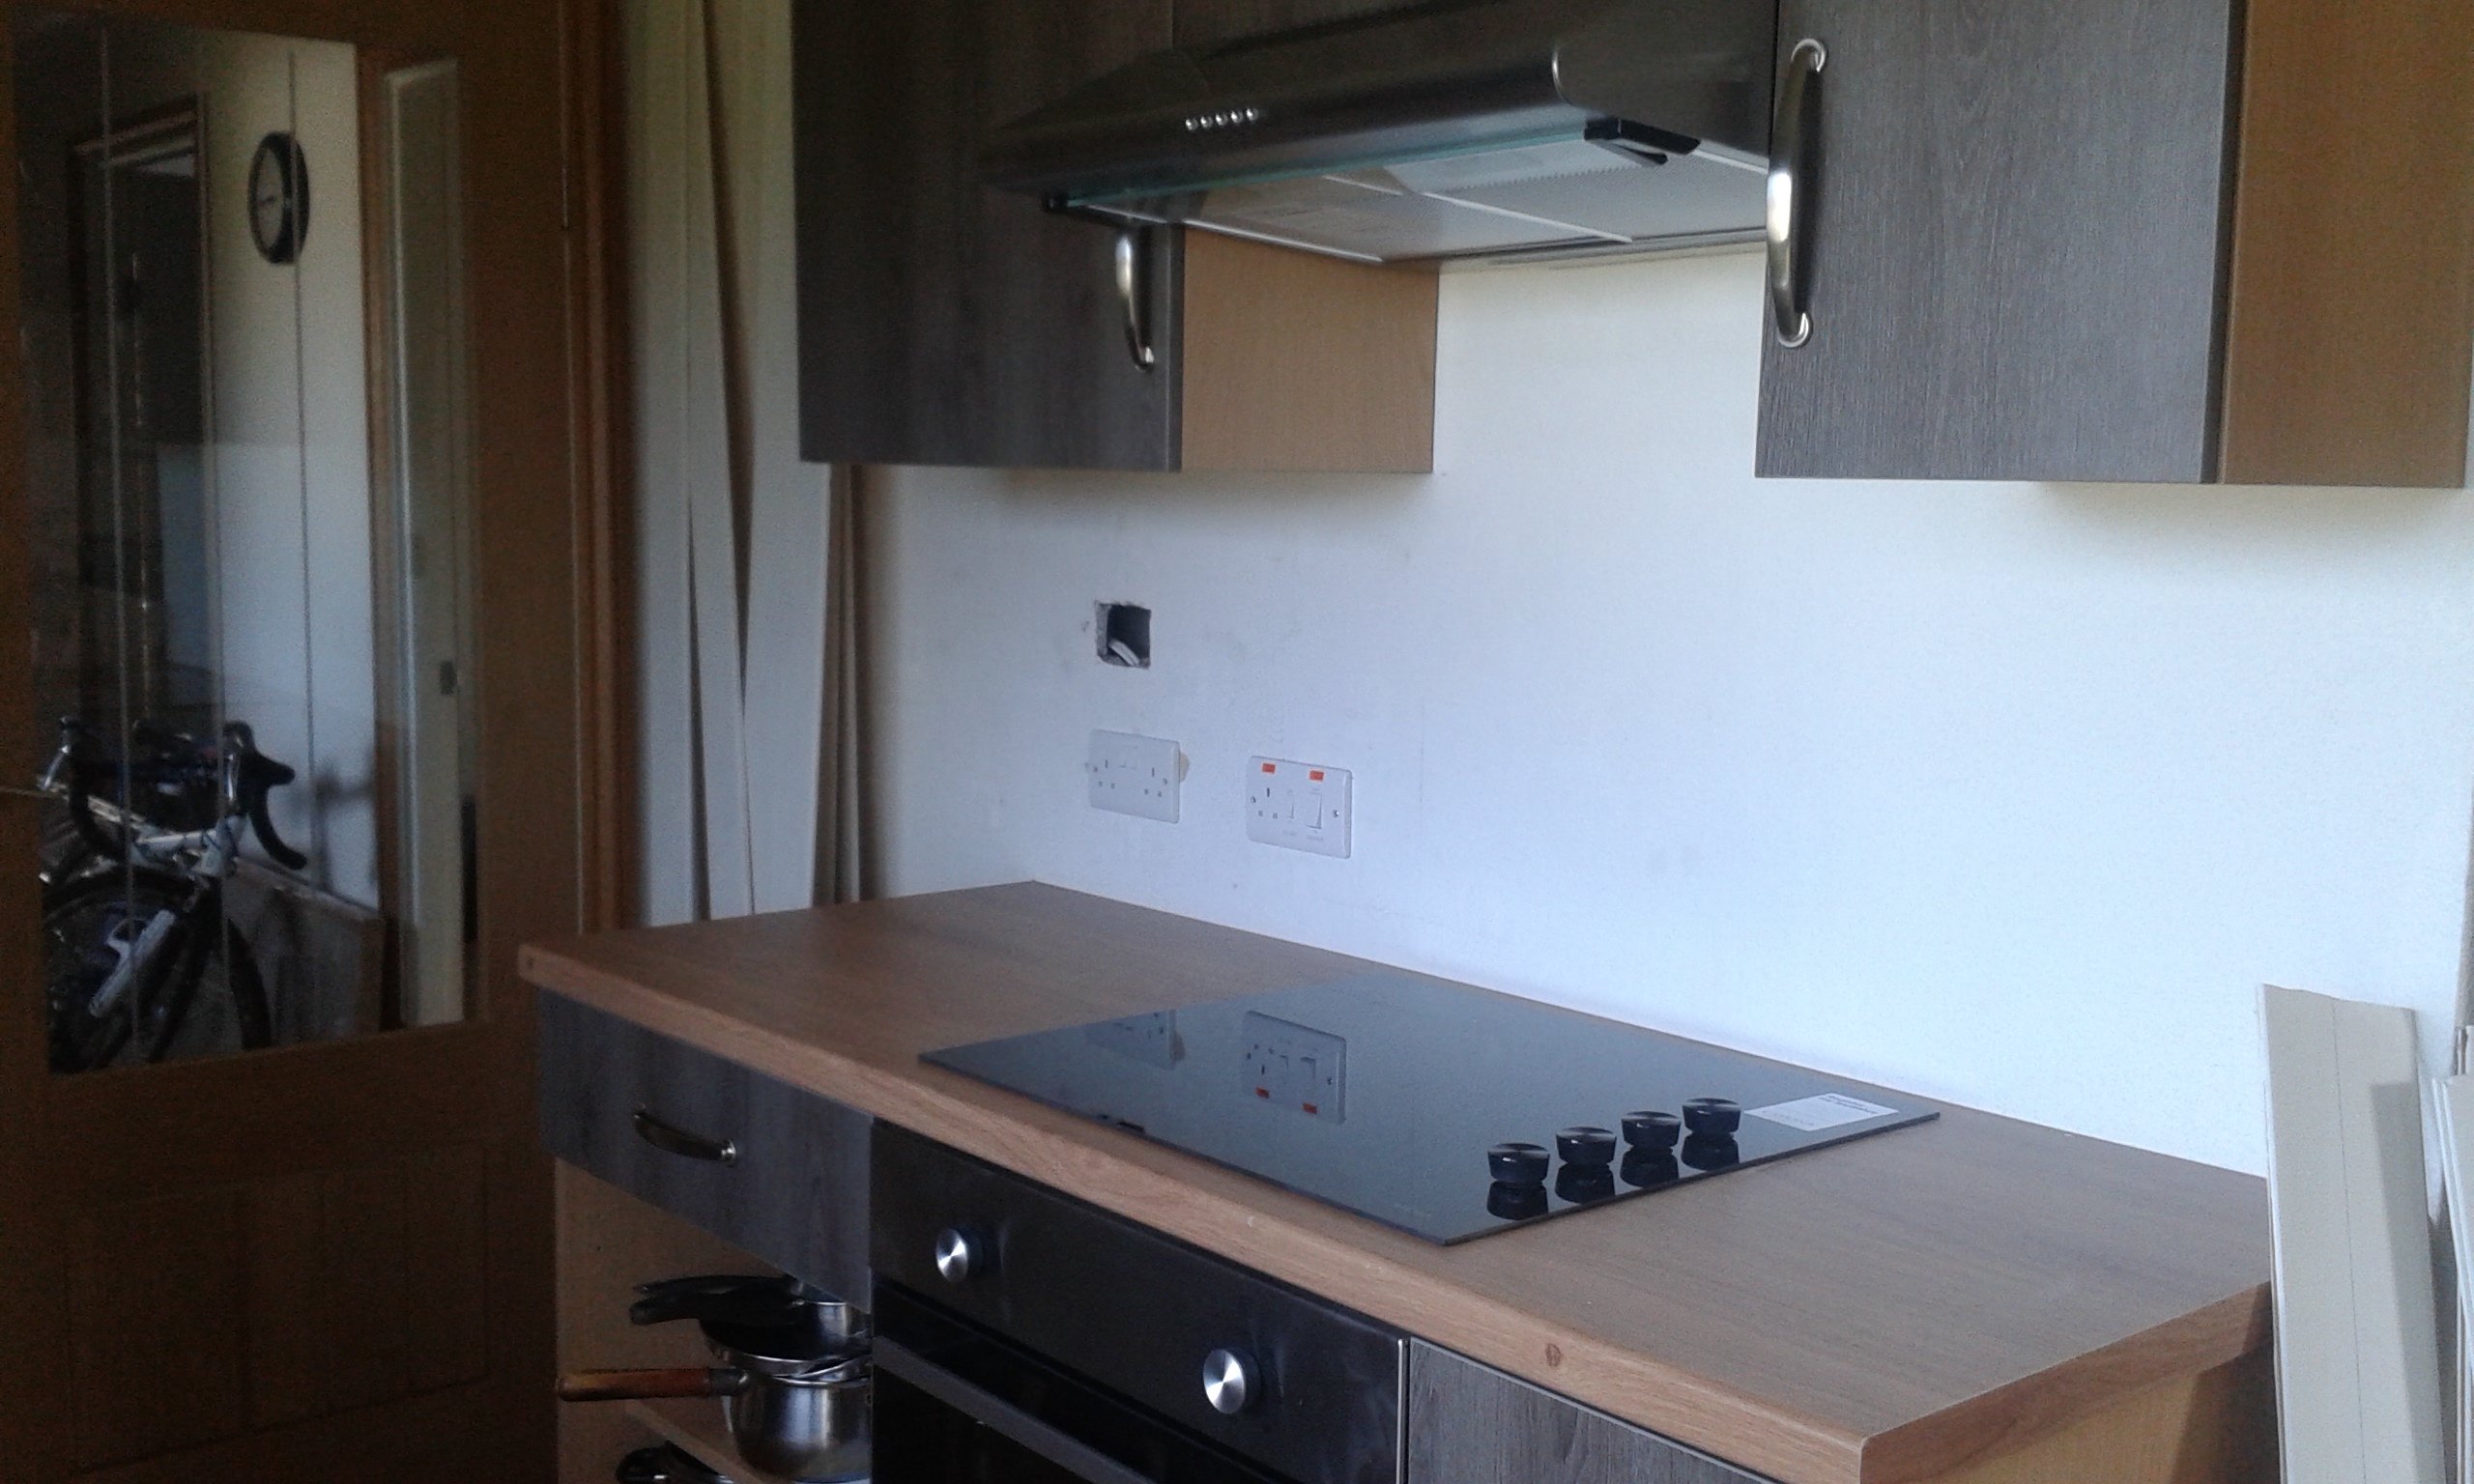
Small kitchen I've had installed for convenience:
There will be light blue panelling covering the walls above the tiles and around the other walls - I should be finishing that tomorrow.

Queries/Problems:

- The walls are chipboard, so I think I'll need to backer board them? I'm not sure how that'll work around around the edges though, which'll be totally exposed.
Really deep tile trim, maybe, tucked under the backer board?
(4-6mm backer board, 6.5mm tile, ?mm adhesive = 12.5-15mm deep trim)

- How high should I tile up the side of the window please? (On the other side, the cabinets are at 46cm, the extractor at 63.5cm.)

- Do the sockets on the cooker side...look OK to you? :confused:

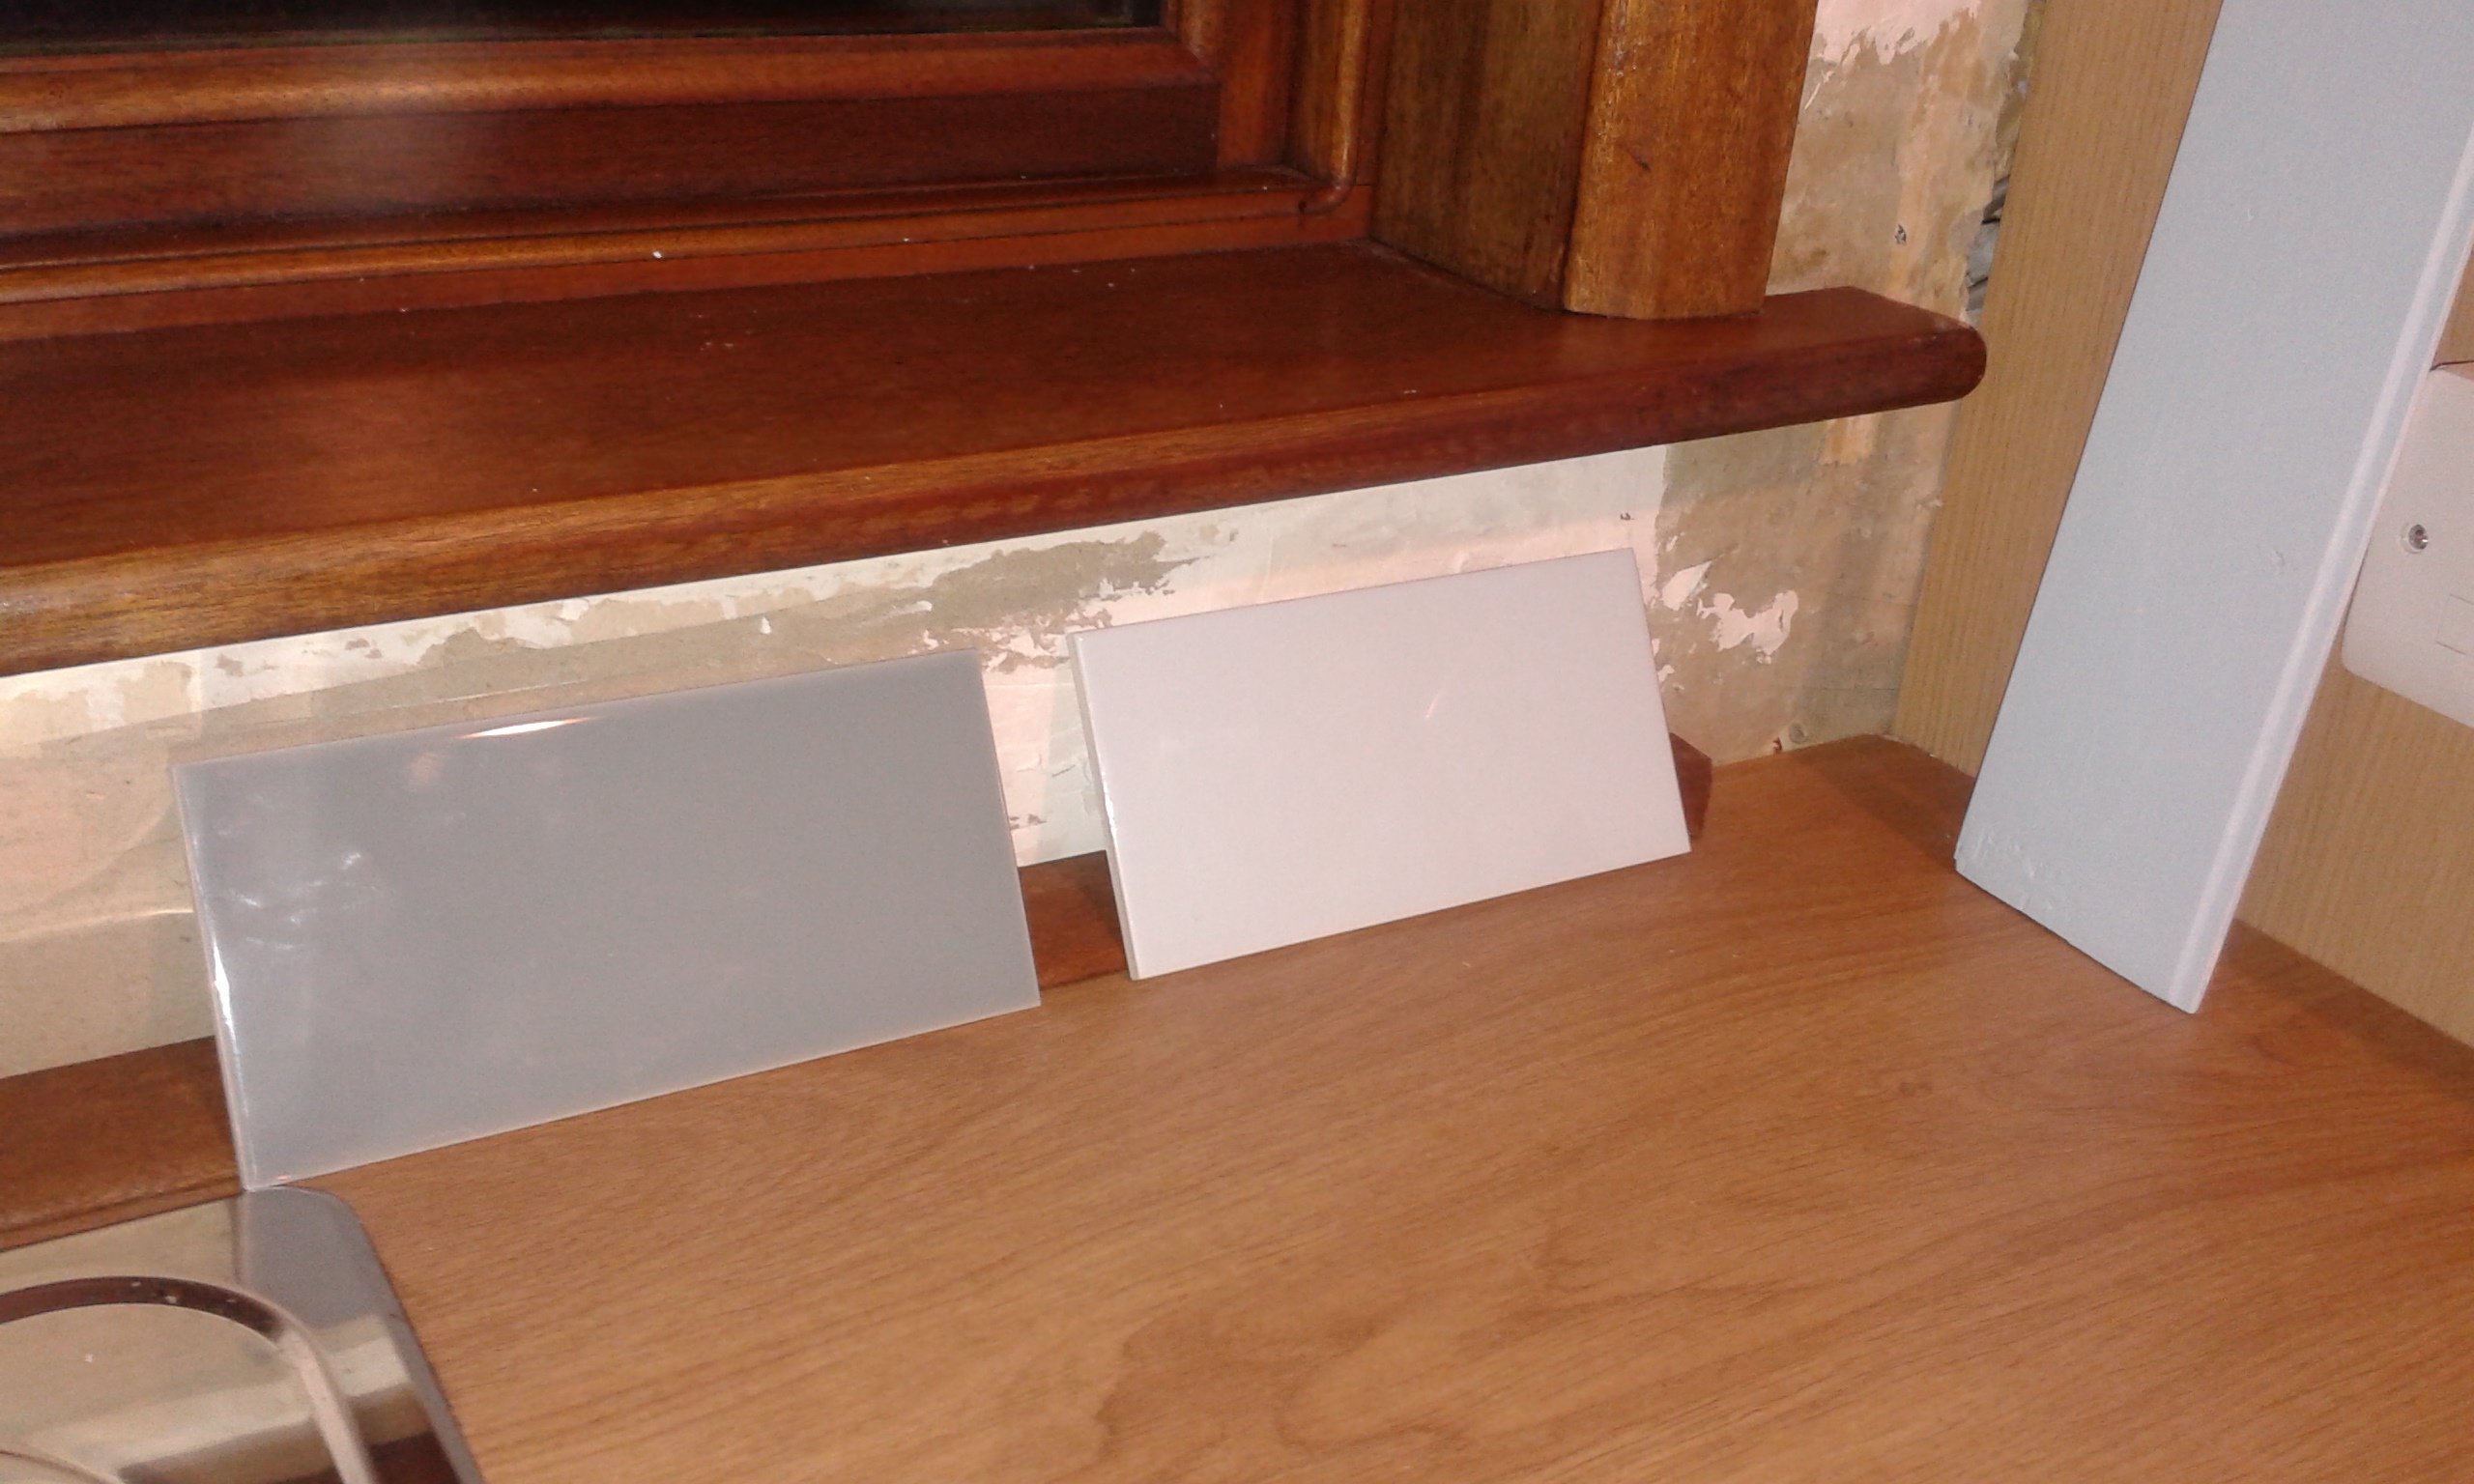
- Tiles. After dithering about going for something different, I'm semi-settled on some simple Johnson Prismatics in Harebell Gloss (20ox10o) - a very light blue.
I'm not keen on metro tiles - I was fancying some in 300x100 or 300x75 - but a lot of the others I looked at had glaze concerns.
The grey tile is there as I was thinking of using it, but I think med grey grout should be enough.
Unless anyone here has a better idea (please!)?

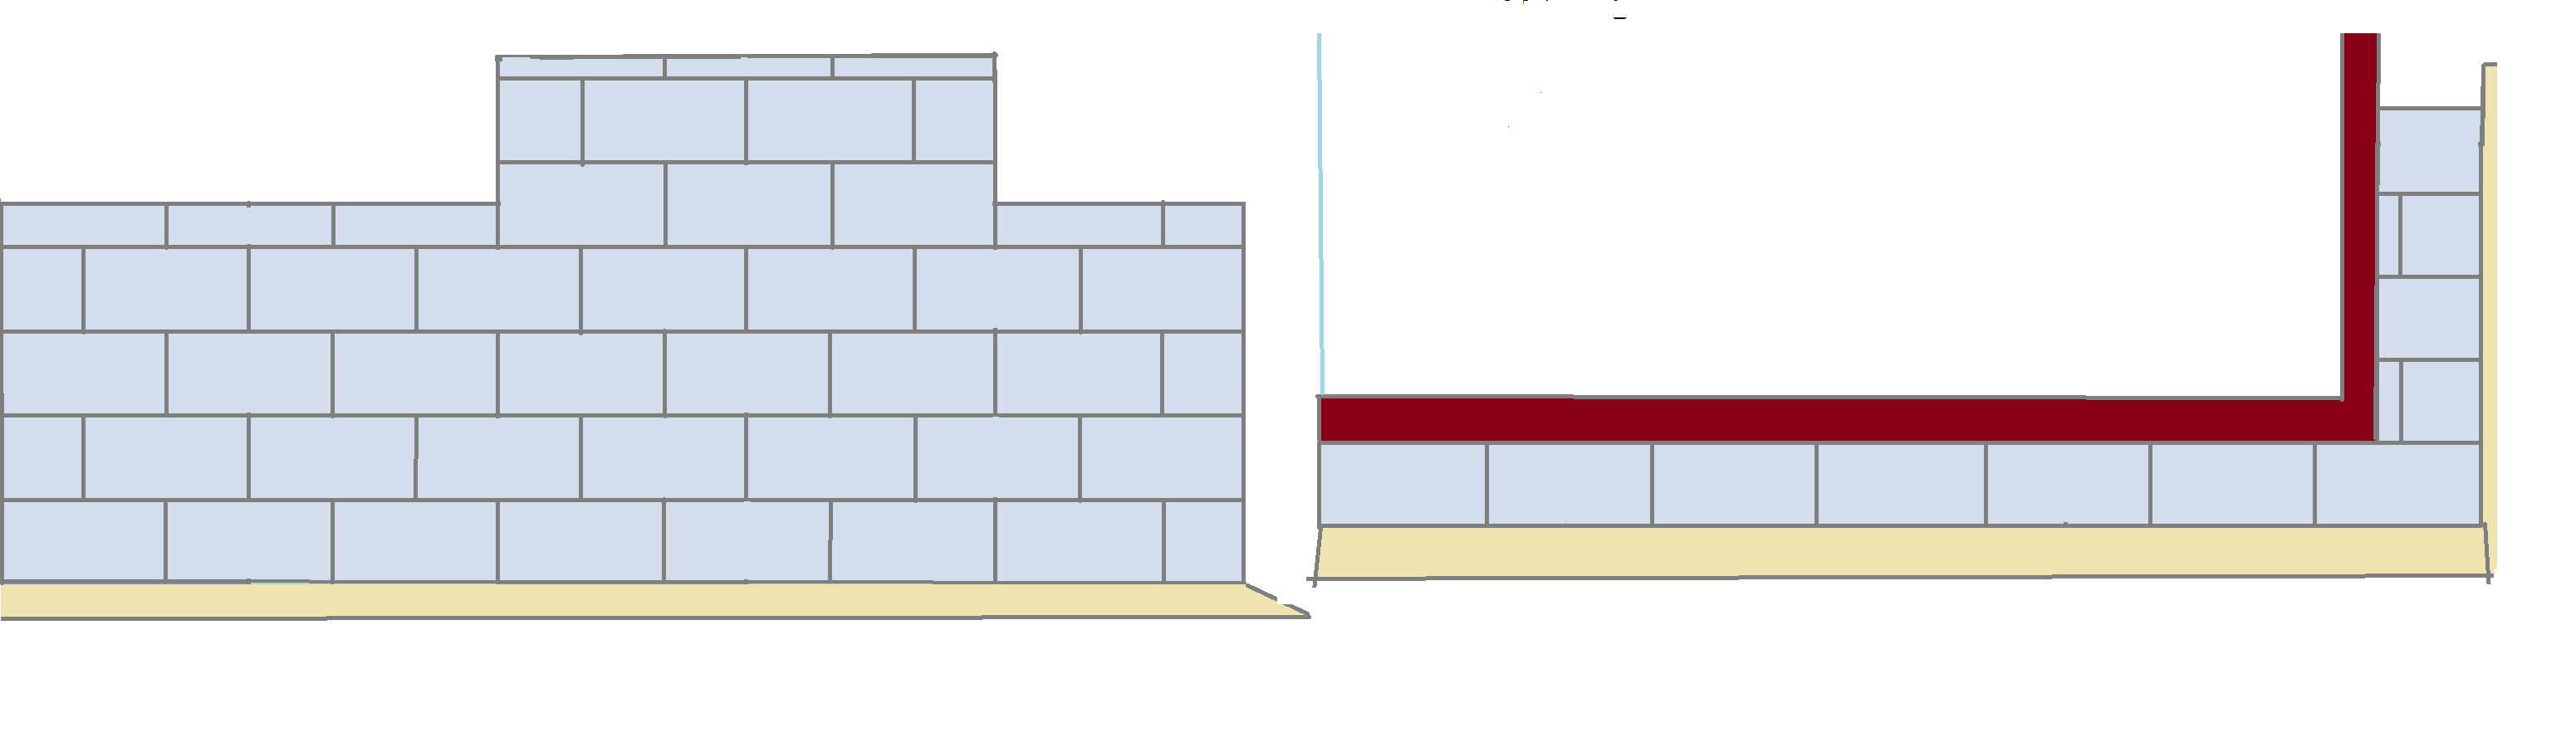
- Tiling pattern. I'm not sure where I should be starting. I've mocked this up, but maybe a whole tile below cupboard level would be better?
Or a different pattern? I'm open to suggestions.

- To finish, Tilemaster Grout 3000 in Medium Grey. Other kit should be Tilemaster too - LTS has only white BAL adhesive, and I don't want to c*ck up and have it showing through.:oops:

Any thoughts greatly appreciated. Thanks.
 
J

Julian 'Farmer' Bonsall

Personally I would match tile heights to cupboard heights not extractor. But its a personal choice.
I would go for whole tile above work surface over a whole tile below cupboard and a cut above work surface.
Electrical outlets. May need longer face screws once tiles are fitted. You look like you have space to plug in awkward right angle chargers above the work surface.
How is the chipboard fixed? And what too? I personally don't like what chipboard does when wet - will it get wet? Granflix I read on here somewhere maybe ?
The pattern is the same as I did with Metros in a kitchen recently - I personally would try and avoid the very thin cuts next to the window - maybe achievable by altering the grout gaps?
 
B

Bill

Those walls don't look like chipboard - more like plasterboard.

Yoy should try and take the paint off the walls where you are going to tile.

Ideally, you should be starting with a full tile from the worktop but you need to check this doesn't leave too thin a cut next to the extractor. If you get a nasty thin cut under the wall units - you can always 'hide' the thin strip by adding a light pelmet to the bottom of the units. (not perfect but it is a solution)

Ask the LTS if they have a slow set cement based adhesive and just clean the joints, as you tile, and then you won't have any problems with grout discolourisation.

What is that strip of wood behind the sink doing?
 
Reaction score
17
Ah. I was wondering if anyone would notice that. It's the window trim. I was going to leave it off, but the sill isn't level. I've had the trim cut down to compensate, so hopefully, the tile gap will be even.

There is a slice of gypsum plasterboard under the window, but all the other walls are chipboard covered in wallpaper. I'll screw the backer board in place as removing wallpaper usually destroys the chipboard.
 
J

Julian 'Farmer' Bonsall

Maybe it is this bit that looks like plasterboard? If you attach a board to the wallpaper/board that's currently there will you have room to the hob one the tiles are in place ?
You have a lot of projects on the go :)

Screenshot 2018-04-13 at 18.33.05 - Edited.png Screenshot 2018-04-13 at 18.33.05 - Edited.png
 
Reaction score
17
Maybe it is this bit that looks like plasterboard? If you attach a board to the wallpaper/board that's currently there will you have room to the hob one the tiles are in place ?
You have a lot of projects on the go :)

View attachment 98178 View attachment 98179

Oh. I am such an idiot. :oops: I've repaired that hole since and it didn't even clock that it's plasterboard. How weird. Well, all the 'other' walls are chipboard. (Or are they?)
So, if I strip the wallpaper off and prime it, I don't need the backer board?

Projects on the go? I only have this little bit of tiling and whatever I'm going to do to the wetroom...however, after this is sorted, I have another kitchen and bathroom to update cosmetically, which could call for more tiling. Definitely more painting, and some wallpapering.
And when the weather improves, the exterior of the whole place - cedar wood shingles - needs oiling. Lots of fencing to treat (though it was all done last year, it needs doing again). Loads of other things - the house has been neglected somewhat.
 
J

Julian 'Farmer' Bonsall

Hey dont worry - Its definitely 'board' anyway. I couldn't edit my message but it should have said room to the hob once the tiles are in place (if you over board the *** board ). I think I spotted a wallpaper join in the photo but wasn't sure.
I assume one can steam/strip the paper (not sure what the adhesive film does), prime and tile?

Oiling cedar chips - now that's something else new to me.
 
Reaction score
17
My worry about the sockets is that they were too close to the cooker - I thought there was a 300mm minimum - and possibly too low. It may also be easier for tiling if they were one block, rather than two.

A google reassures me that the 300mm is guidance rather than regulation, but still something to consider before tiling.

Why is nothing ever simple?
 
J

Julian 'Farmer' Bonsall

It's not a gas cooker so you don't have to worry about gas safe certificates for potential combustible materials. However the materials for the socket and any wiring must be suitable for the temperature rises expected. So for example it possible to certain metal systems that cope with the heat.

If you can plug one of those annoying right angled chargers in it then maybe that's high enough but up to you.
Not sure combining the cooker isolation and three sockets is possible so I think your solution is okay (see how the tile cuts work out with the spacing of your sockets).

Have fun.
 
J

Julian 'Farmer' Bonsall

I should have said suitable for the environment not just temperature ( so steam, splashes etc)
Part P and Part M are riviting and full of the vaguest data around. They explain about none notifiable works. I personally think you have sited them well as you don't have to lean over the hob to access in the case of a problem. The twin outlet maybe have a usb one if your thinking of charging devices from it.
 
Reaction score
48
Just incase you didn't know, there should be a gap between the tiles and the worktop, silicon manufacturers prefer a 3mm gap but I find 2 is fine, it needs a bit of a key and also helps in case anything starts moving.
 

Reply to Small kitchen tiling job for a newbie - suggestions appreciated in the DIY Tiling Forum area at TilersForums.com

Or checkout our tile courses and training forum or the Tile Blog / Latest Blog Posts

This website is hosted and managed by www.untoldmedia.co.uk. Creating content since 2001.
Tile Contractor Forum. The useful tile contractor website.

New Tiling Questions

UK Tiling Forum Stats

Threads
67,360
Messages
881,158
Members
9,532
Latest member
Matthew77
Top
AdBlock Detected

We get it, advertisements are annoying!

Sure, ad-blocking software does a great job at blocking ads, but it also blocks useful features of our website. For the best site experience please disable your AdBlocker.

I've Disabled AdBlock    No Thanks