Discuss New Range Gemini Studio wave tiles 900x300x12mm in the Canada area at TilersForums. The USA and UK Tiling Forum (Also now Aus, Canada, ROI, and more)

B

Blunt Tool

IMG_0085.JPG
Anybody installed these lately, if so did you chase the pattern by using the cut off from last wall to start the next one and internal mitre them all? Only way I can see how to keep the embossed wave going?
 
Last edited by a moderator:

Dan

Admin
Staff member
Reaction score
5,031
That's asking for trouble. You'll need to have all internals perfectly plumb for that to happen!
 
B

Blunt Tool

That's asking for trouble. You'll need to have all internals perfectly plumb for that to happen!
Yes I know but can't cut straight as will be tight at tiles highest points and around 8mm gap to next highest point unless profile cuts to suit but wave will be slightly off unless I run the silicone and smooth off with my elbow :)
 
T

Tile Shop

Ok, I always do this when I'm bored. I have work to do but need to take the odd break from it to keep my sanity.

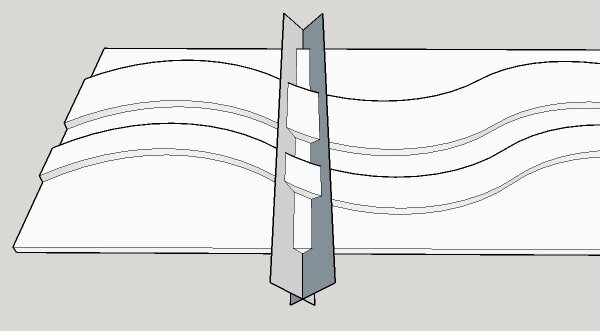
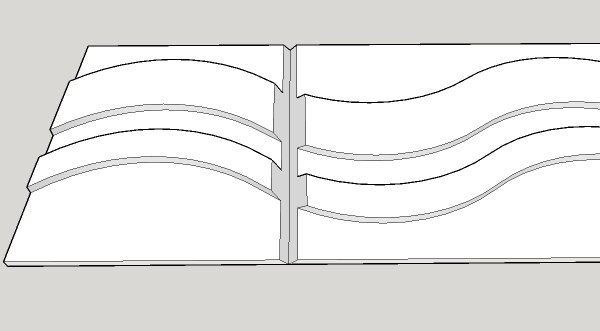
The only way an internal mitre would work would be by using 2 tiles mitred from an exact measurement of the highest point of the tile (and providing the layout of the wave is exactly the same on each tile). By doing an internal mitre on 2 pieces cut from 1, the pattern will not line up exactly. you will lose as much as 34mm from the design.

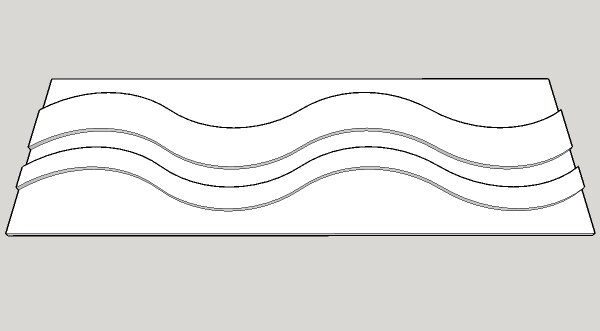
Heres a tile, 900x300,base 8mm thick, the curves going up to 17mm deep.
Curve Mitre 1.jpg

For this example, lets say you need to cut your mitre at 250mm
Curve Mitre 2.jpg
Curve Mitre 3.jpg

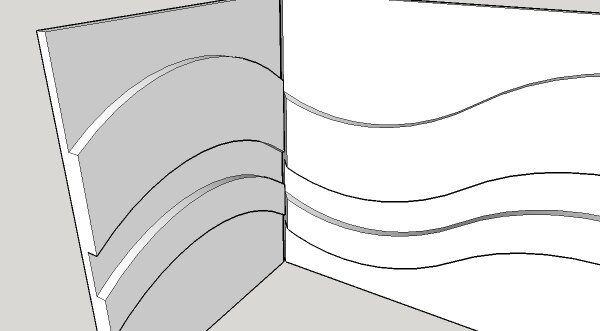
You have potentially lost 34mm of the wave. When the two pieces are put together, the wave doesn't flow exact.
Curve Mitre 4.jpg

Probably won't make as much difference on your tile as the wave is less extreme than on mine....... but don't expect it to line up 100% unless you're willing to sacrifice an extra tile to do it.

I just needed an excuse to take 20 minutes away from a monotonous spreadsheet and couldn't think of a better way to do it :)

Back to work.
 
Last edited by a moderator:
T

Tile Shop

The bit that comes off has all the ridges on the same place/line as the bit fixed, just use an angle grinder to cut the 8-17mm ridges out of the return piece. No fancy graphics like @Paul C. but I'am having a cup of tea.;)

Forgive me if i'm being thick.... but do you me tile right up to the wall on one side, then after a bit of grinding, interlock the return piece with the contours on the face of the first?

Sorry, just trying to picture it.
 
B

Blunt Tool

IMG_0106.JPG
IMG_0107.JPG
Well started this tile today, just got to chase pattern, by good luck no small cuts in any corners! I did straight cut first then used it to profile the cut off minus thickness of tile aswell to do return onto next wall! The doorway is full height so doesn't matter about last return. Well said @timeless john, hope that was a nice cuppa!
 
O

On one

I've seen those tiles on a local showroom display......they looked that nice I thought about having in my bathroom,when I get round to it!
 
B

Blunt Tool

I've seen those tiles on a local showroom display......they looked that nice I thought about having in my bathroom,when I get round to it!
Don't know if I would have them all round maybe feature wall then rest the plain tile.
 

Reply to New Range Gemini Studio wave tiles 900x300x12mm in the Canada area at TilersForums.com

Or checkout our tile courses and training forum or the Tile Blog / Latest Blog Posts

This website is hosted and managed by www.untoldmedia.co.uk. Creating content since 2001.
Tile Contractor Forum. The useful tile contractor website.

New Tiling Questions

UK Tiling Forum Stats

Threads
67,363
Messages
881,172
Members
9,534
Latest member
Midland Commercial
Top
AdBlock Detected

We get it, advertisements are annoying!

Sure, ad-blocking software does a great job at blocking ads, but it also blocks useful features of our website. For the best site experience please disable your AdBlocker.

I've Disabled AdBlock    No Thanks